Subscription Detection - Onboarding
Welcome to the Subscription Detection feature at Calqulate. Subscription detection creates SaaS metrics, subscription data and revenue recognition out of the invoices that are issued from your accounting software, such as Quickbooks, Xero and Procountor. Calqulate imports your customers, products and sales invoices from the accounting software and combines this data to generate subscription metrics. To ensure that the process goes correctly, you will need to set up a few things first. Any setting can also be changed later on.
Where to find the Subscription detection
Go to the left-hand menu CUSTOMERS > Subscriptions and click Detect subscriptions.
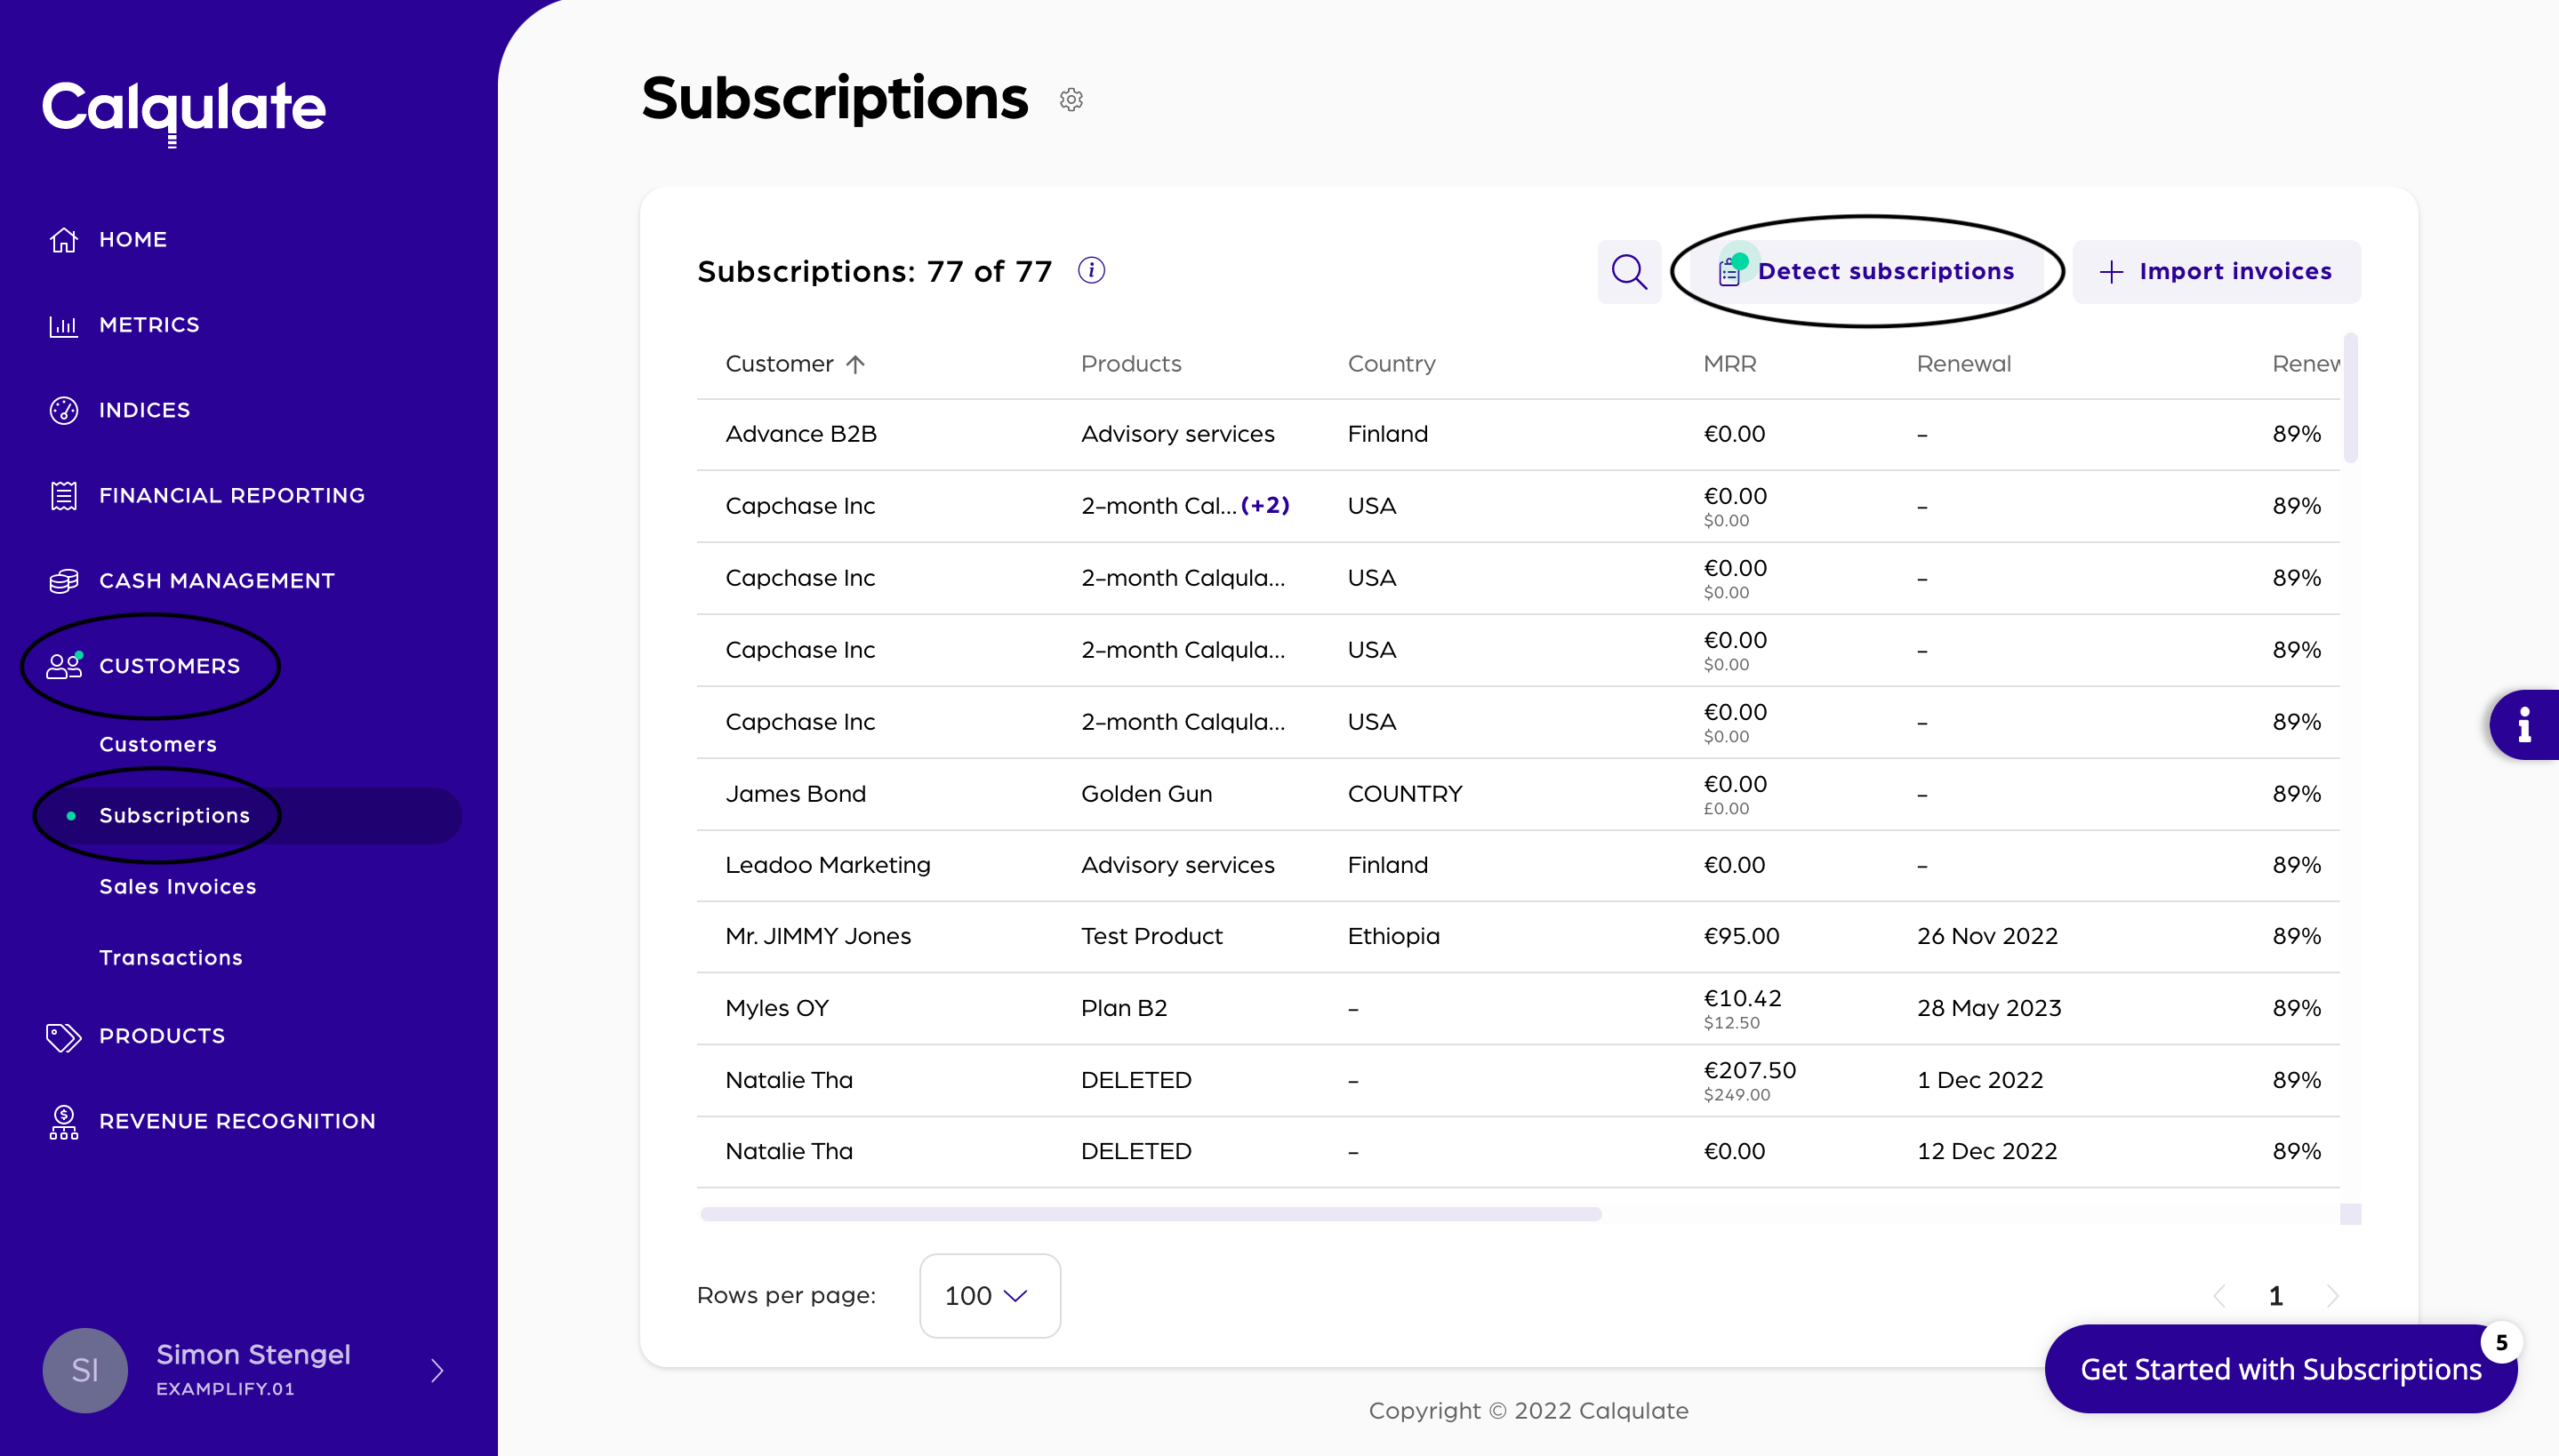
Note: If you have not connected your Accounting or Subscription Management Software or have not imported Invoices and Products with CSV-files, you will not be able to proceed. Please import a source of subscription data first. In case you do not know how to connect your subscription integration to Calqulate, check out this section and look for your integration.
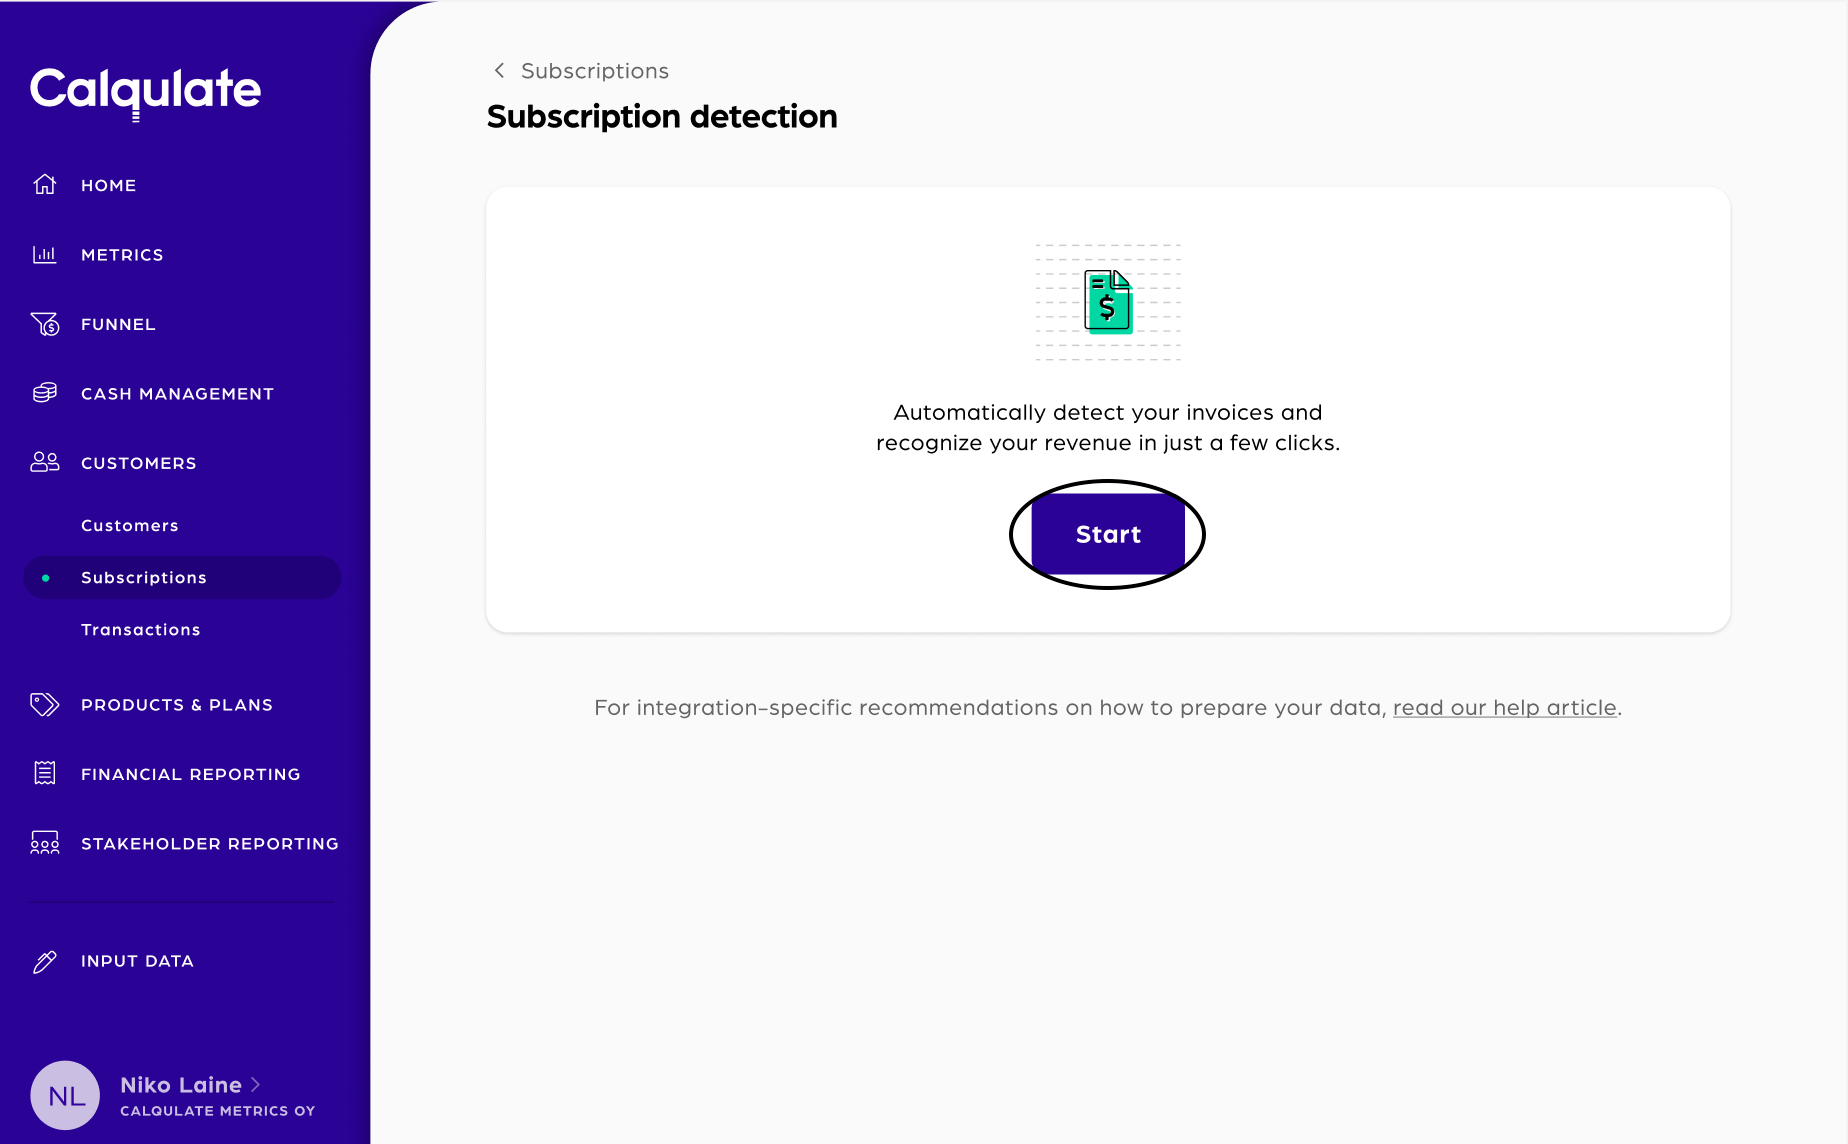
To start the subscription detection process, click Start.
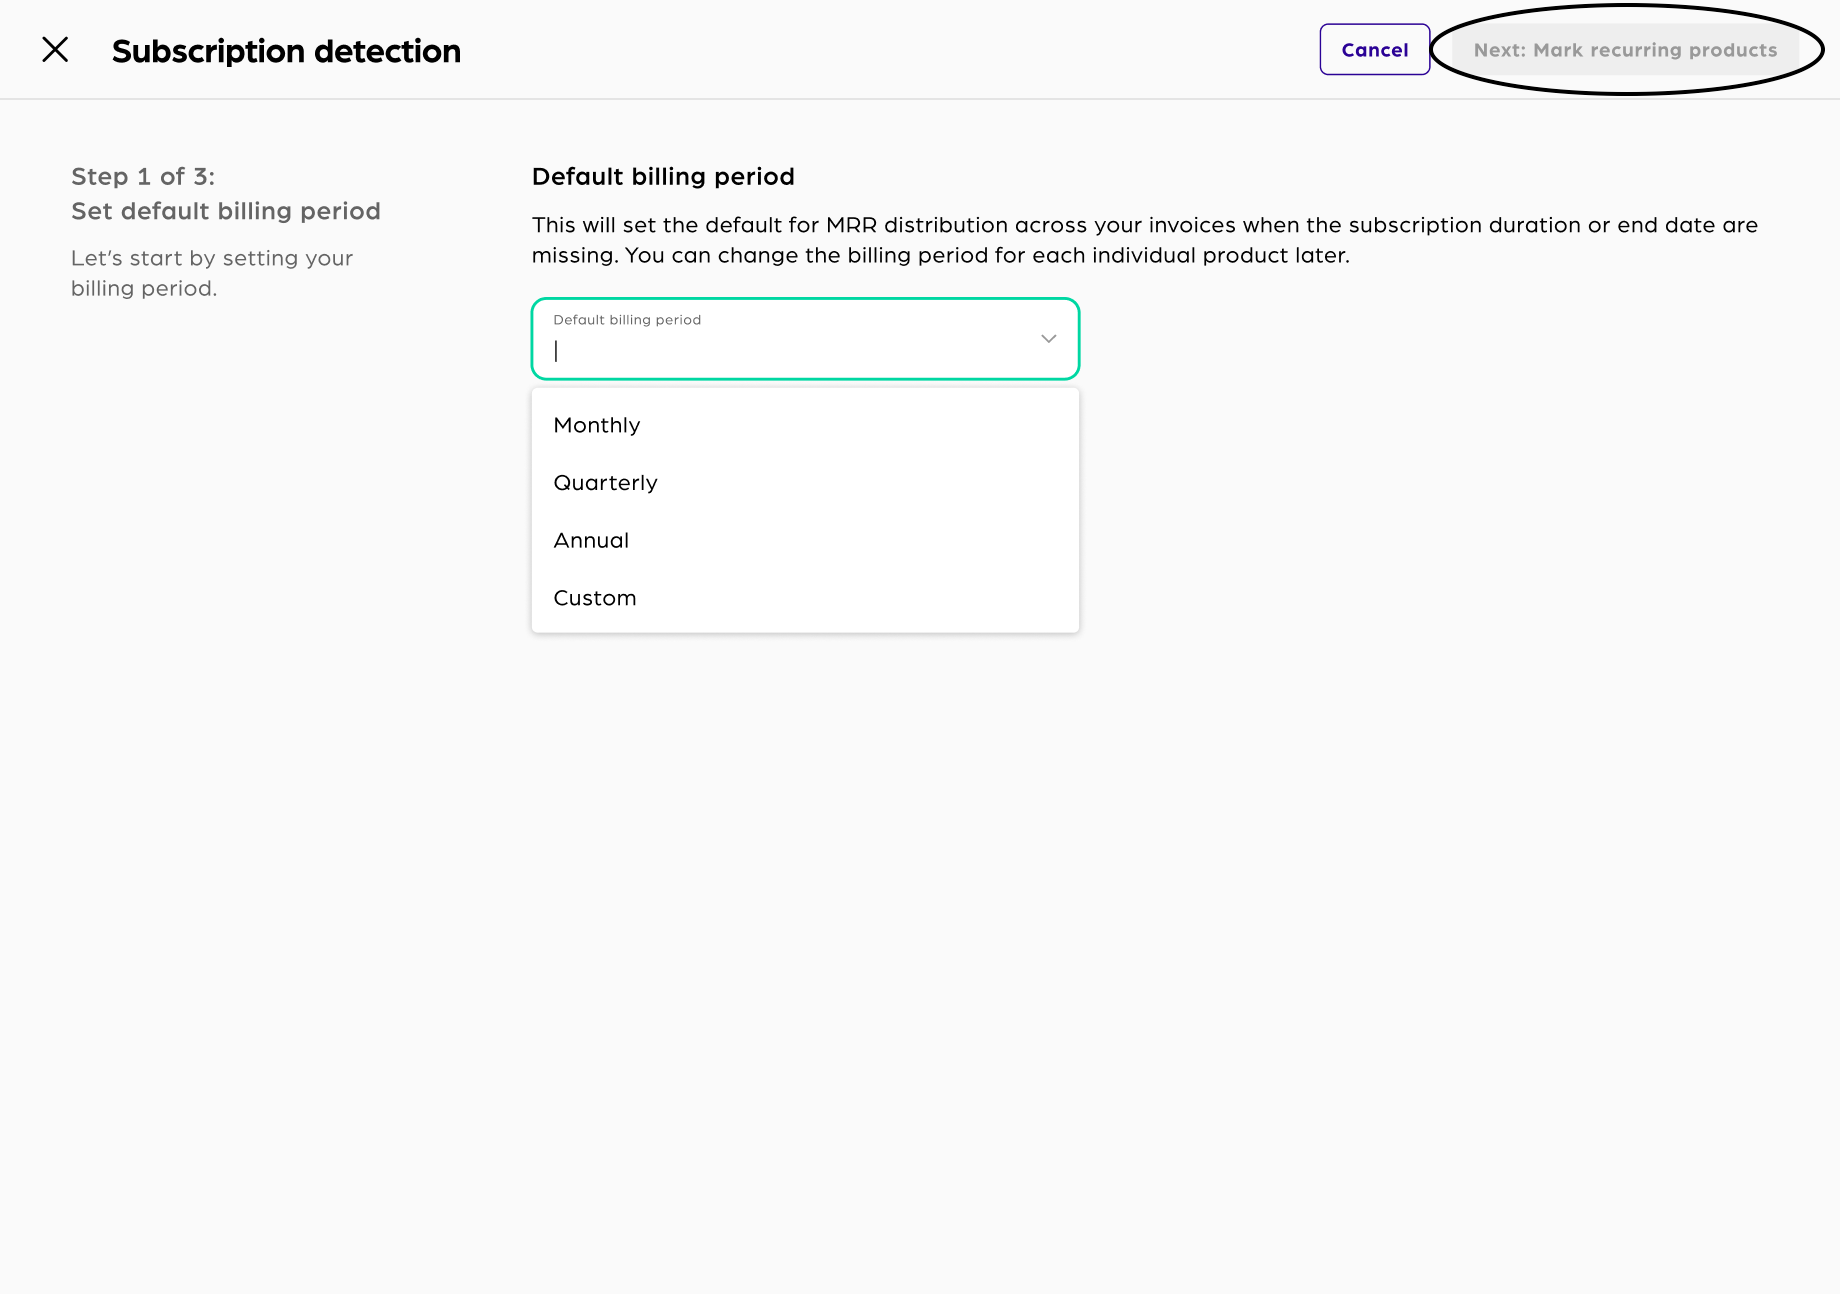
The first step is to set up your default billing period. If the billing period is missing in an invoice, this period will be used as default billing period. You can choose between:
- Monthly
- Quarterly
- Annually
- Custom (create your own)
After choosing your default period, continue with Next: Mark recurring products.
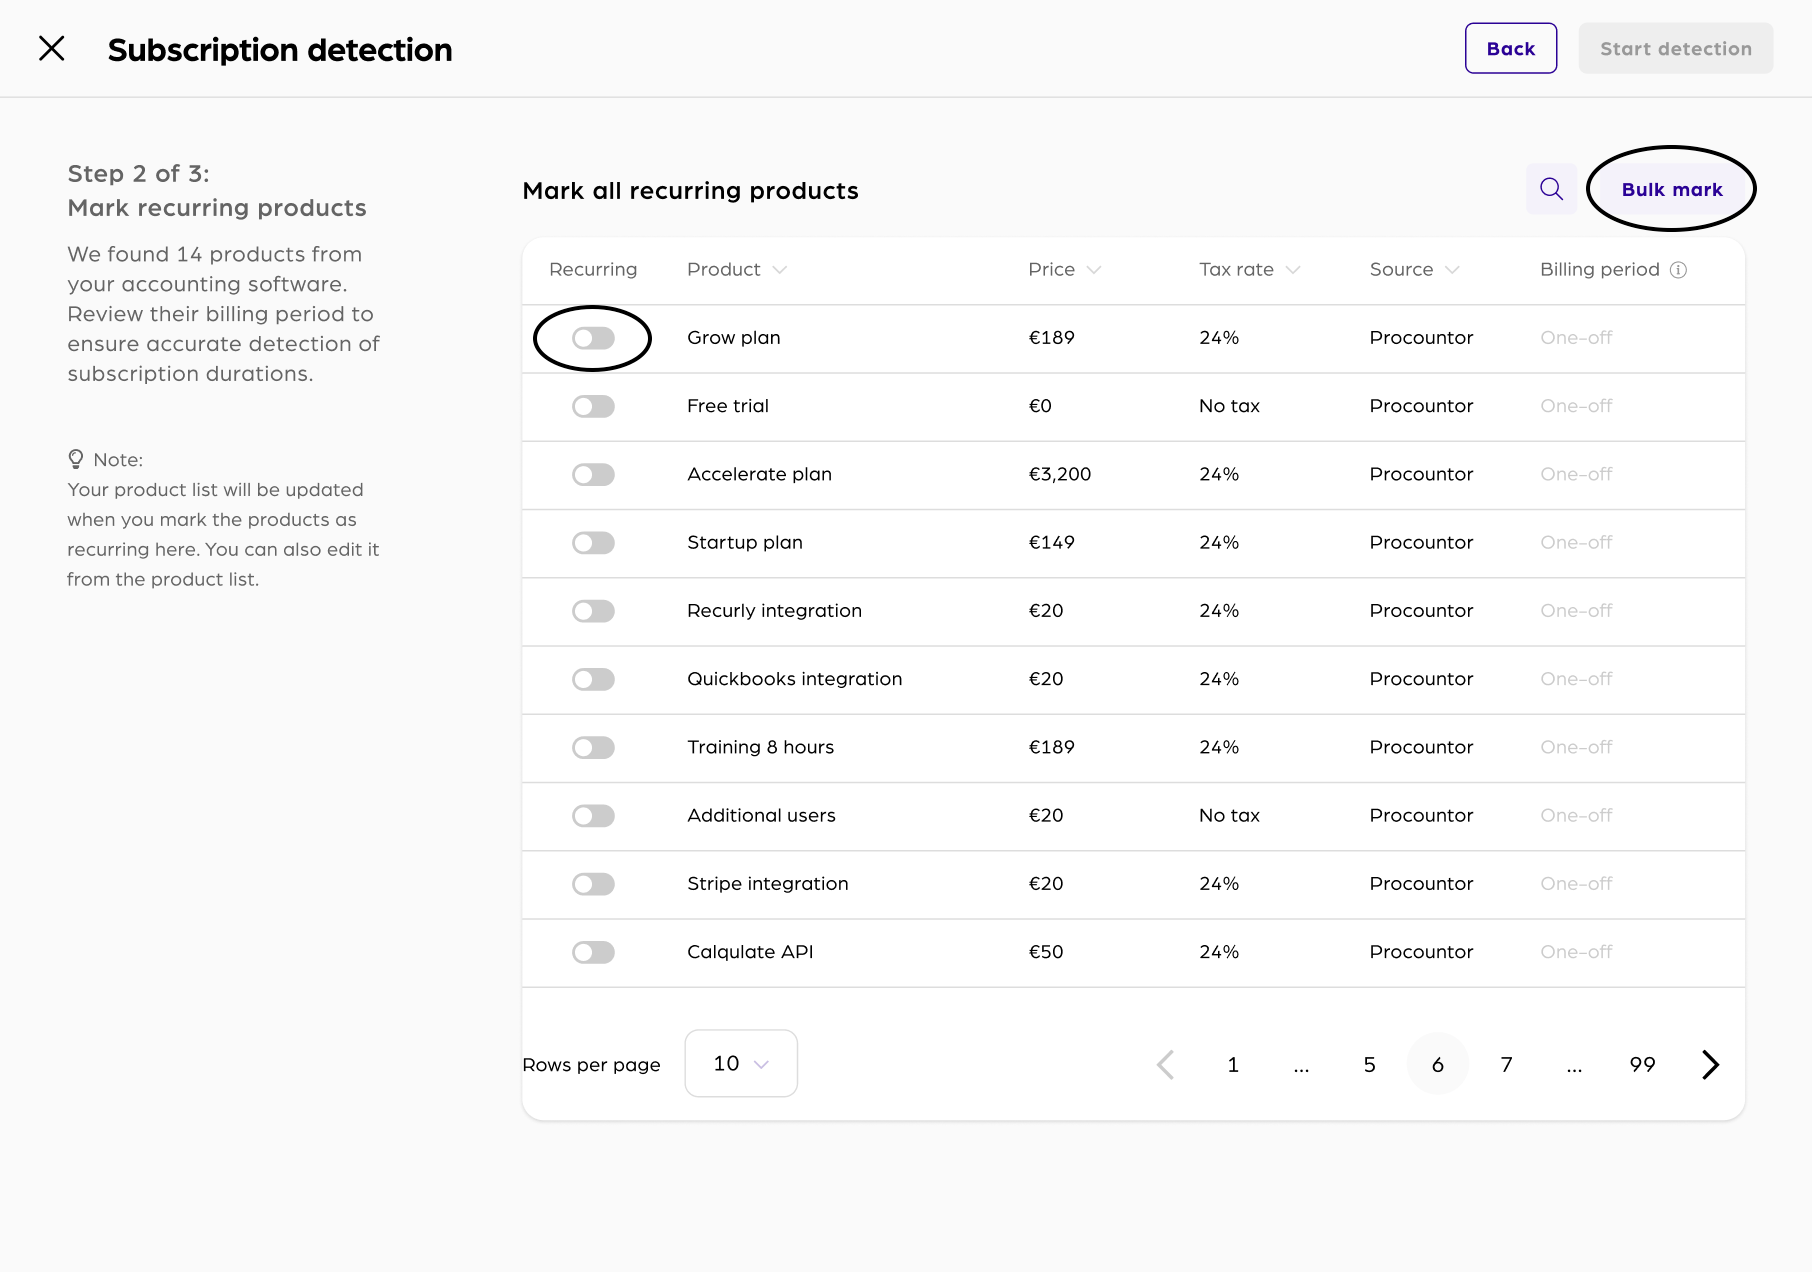
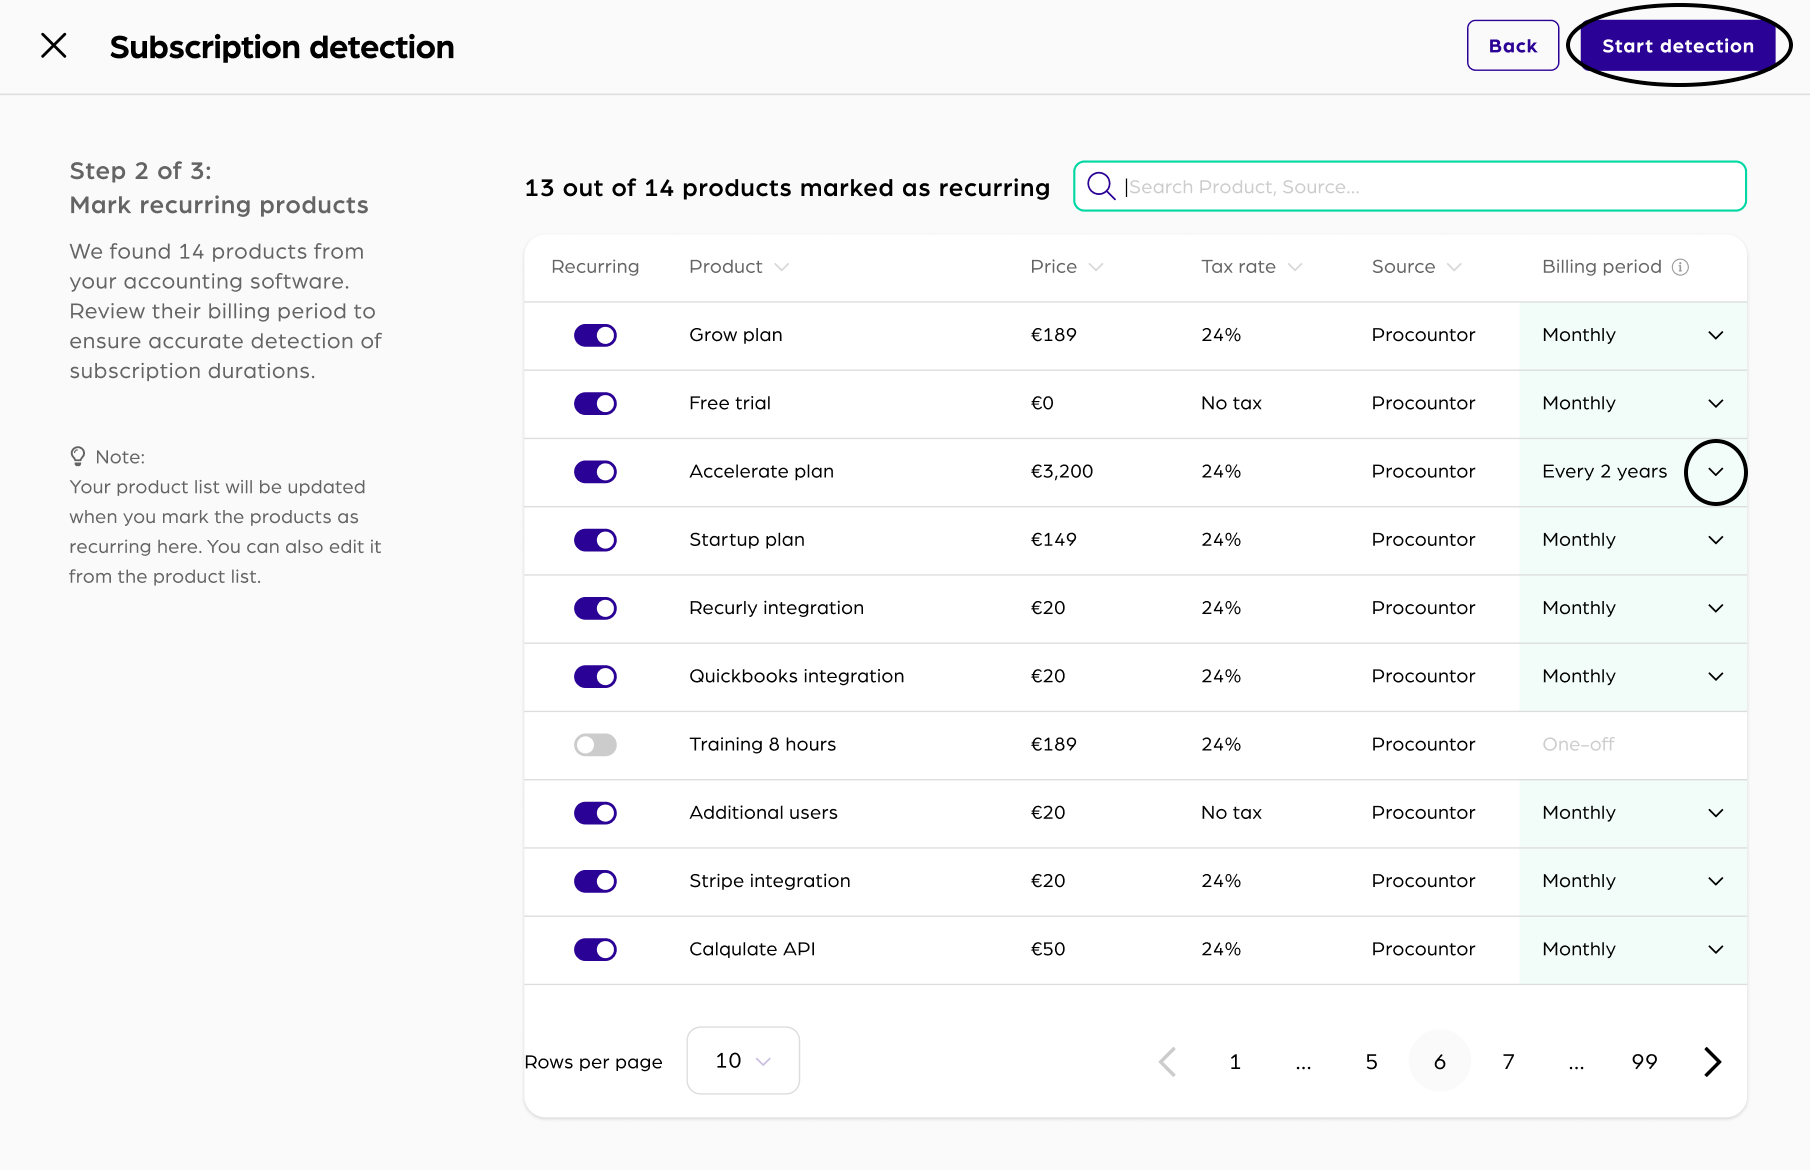
In the second step we ask you to mark all your recurring products. This can be done either by Clicking the toggle in the left column Recurring or using the Bulk mark. If you have a lot of recurring products, you can mark all products as recurring by using bulk mark and then changing the status for the One-off products manually.
The billing period is set to the default period you chose in the step before. If you want to adapt it for a certain product, use the drop down menu in the column Billing period. Continue then by clicking Start detection.
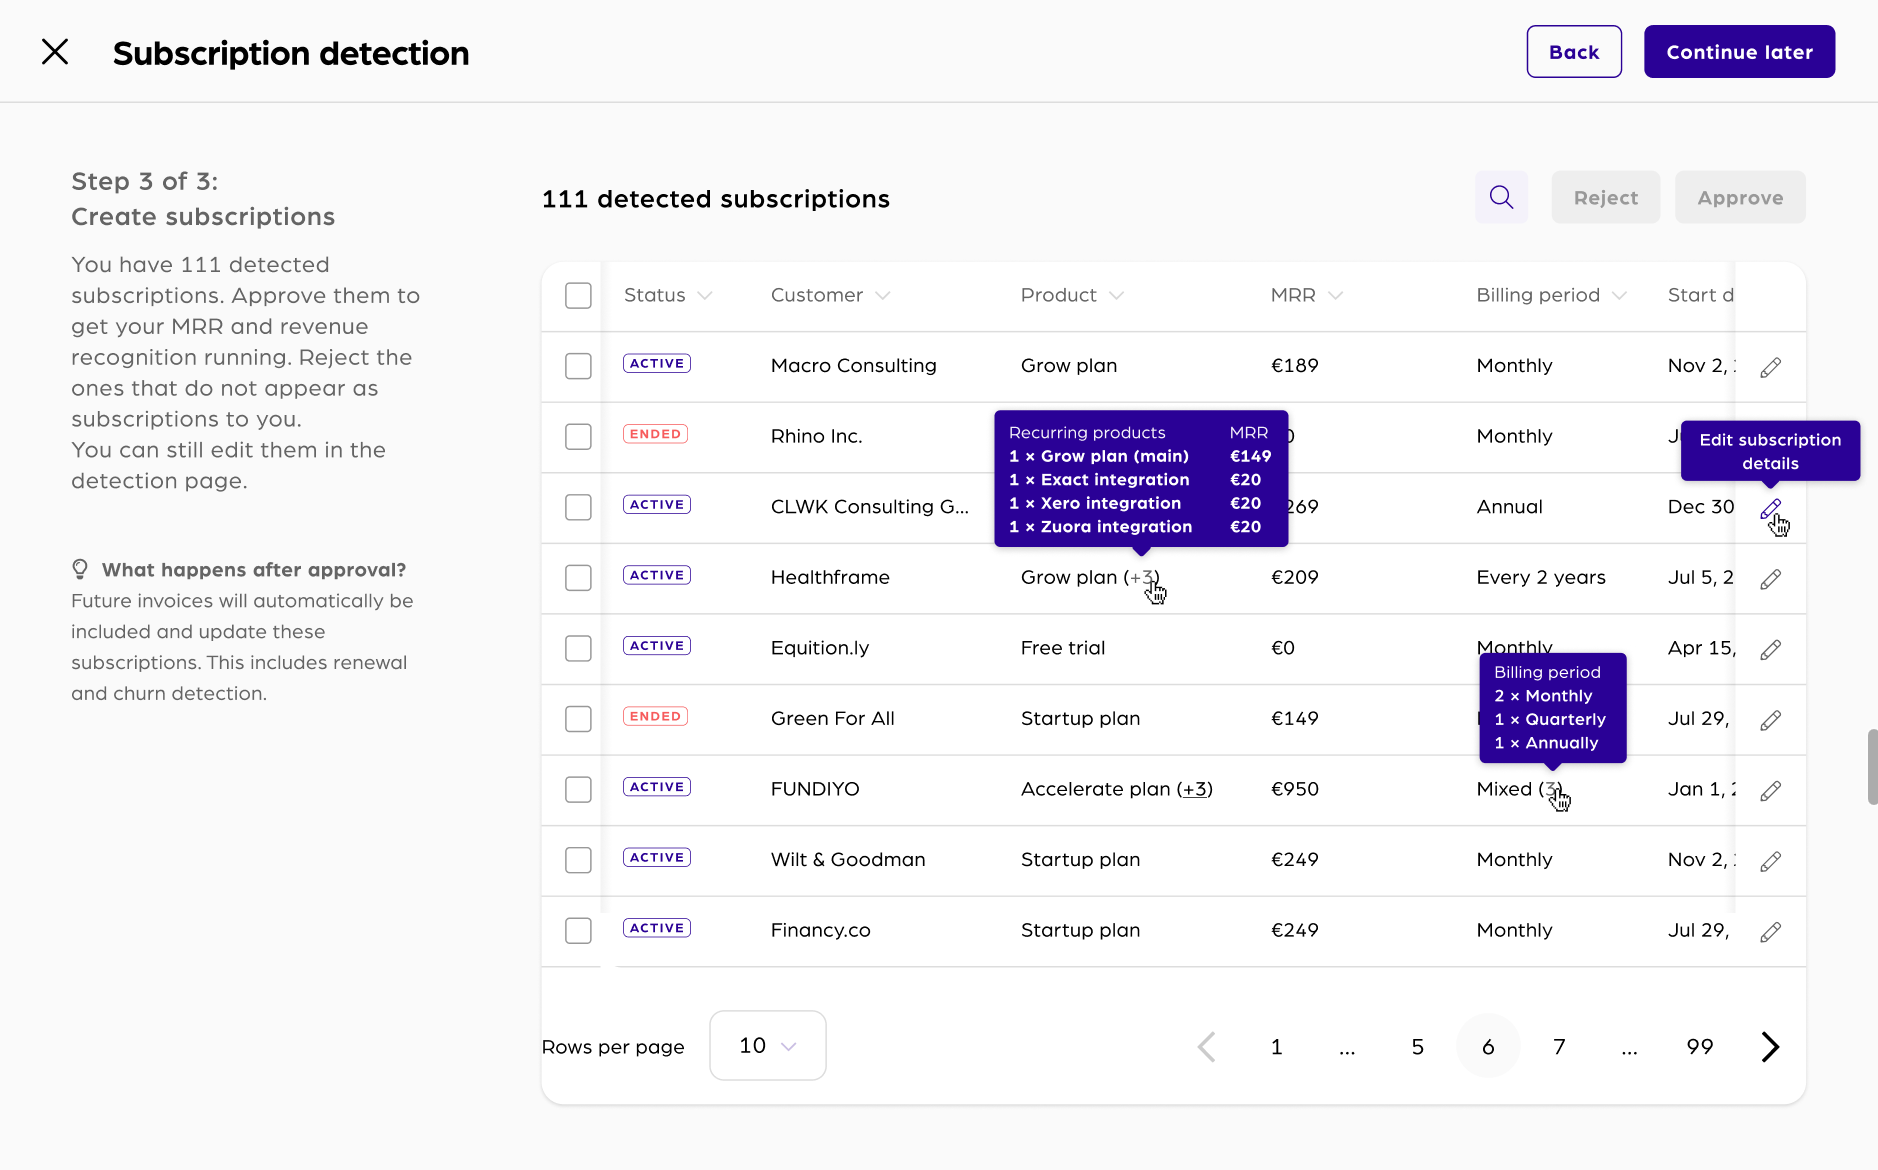
After setting up all recurring products, Calqulate start detecting your subscriptions. You can now see a list of all detected subscriptions and their details:
- Customer
- Product
- MRR
- Billing period
- Start date
- End date
- Source
For some Products or Billing periods the value might be displayed as (+2) for example. To get more information about those subscriptions, hover over the cell. There can be several products or billing periods linked to each subscriptions.
You have also the option to edit the subscriptions before you approve them. For editing choose the small pencil icon on the right side of the screen.
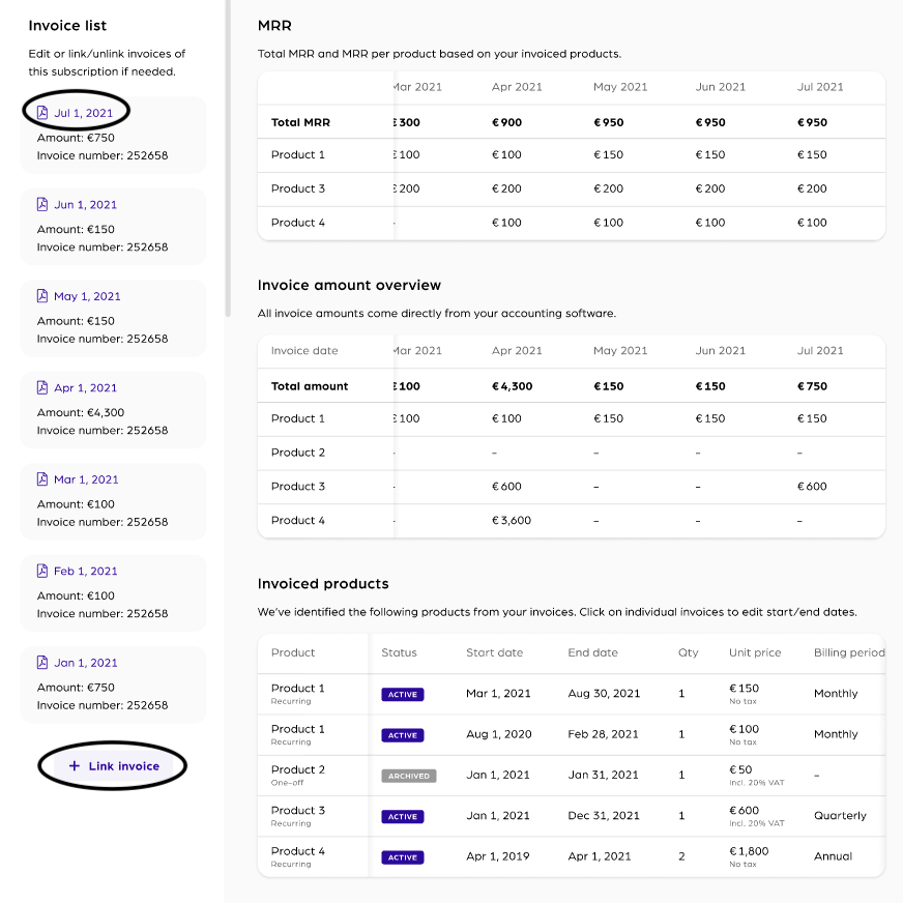
If you click on edit the invoice, you can see all billing, MRR and product details related information of this subscription. On the left side of the screen, all invoices related to this subscription are listed. Bu clicking on them you can edit the billing details.
You can also link invoices to a subscription. Therefore click Link invoice below the first invoice on the left side of the screen. Choose an invoice by searching for its number, customer name, product name, total amount or invoice date and confirm with Link.
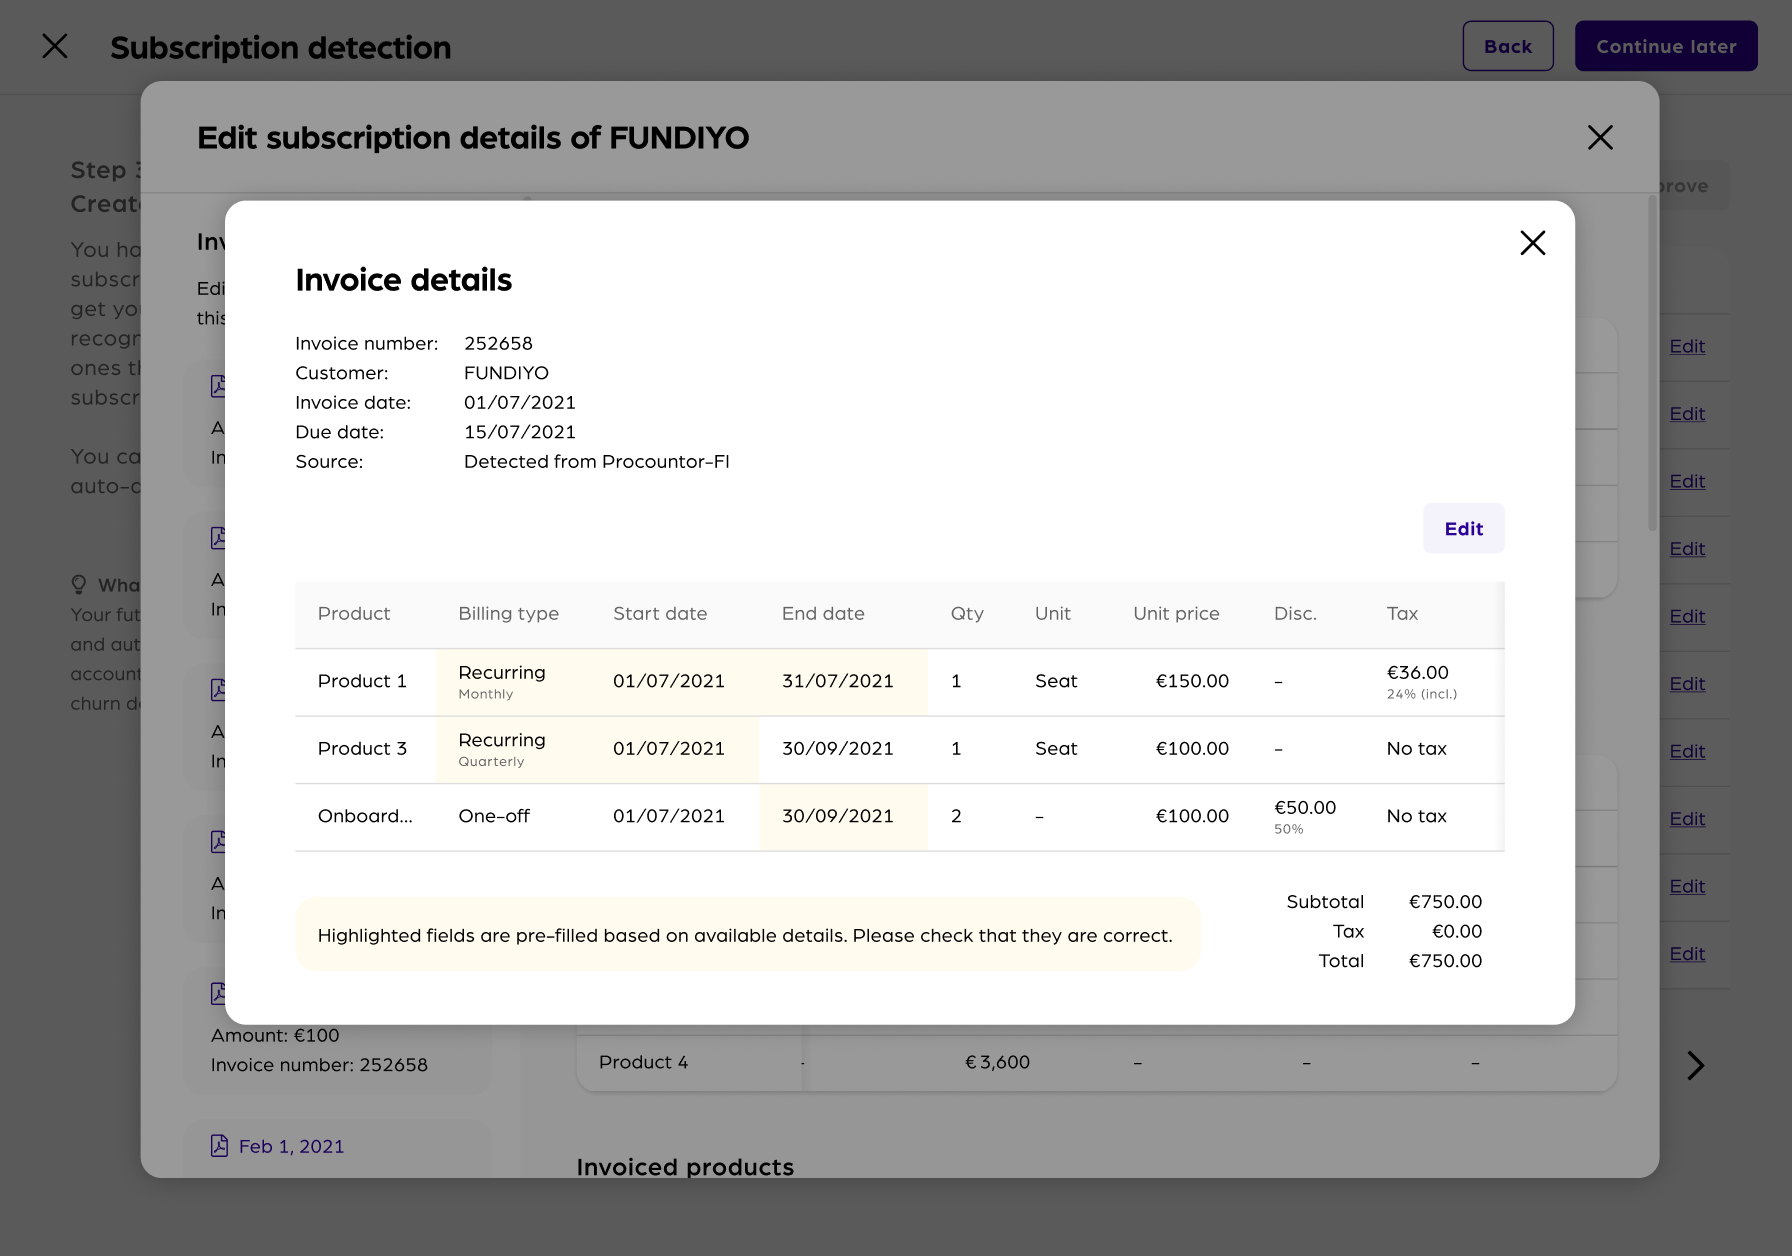
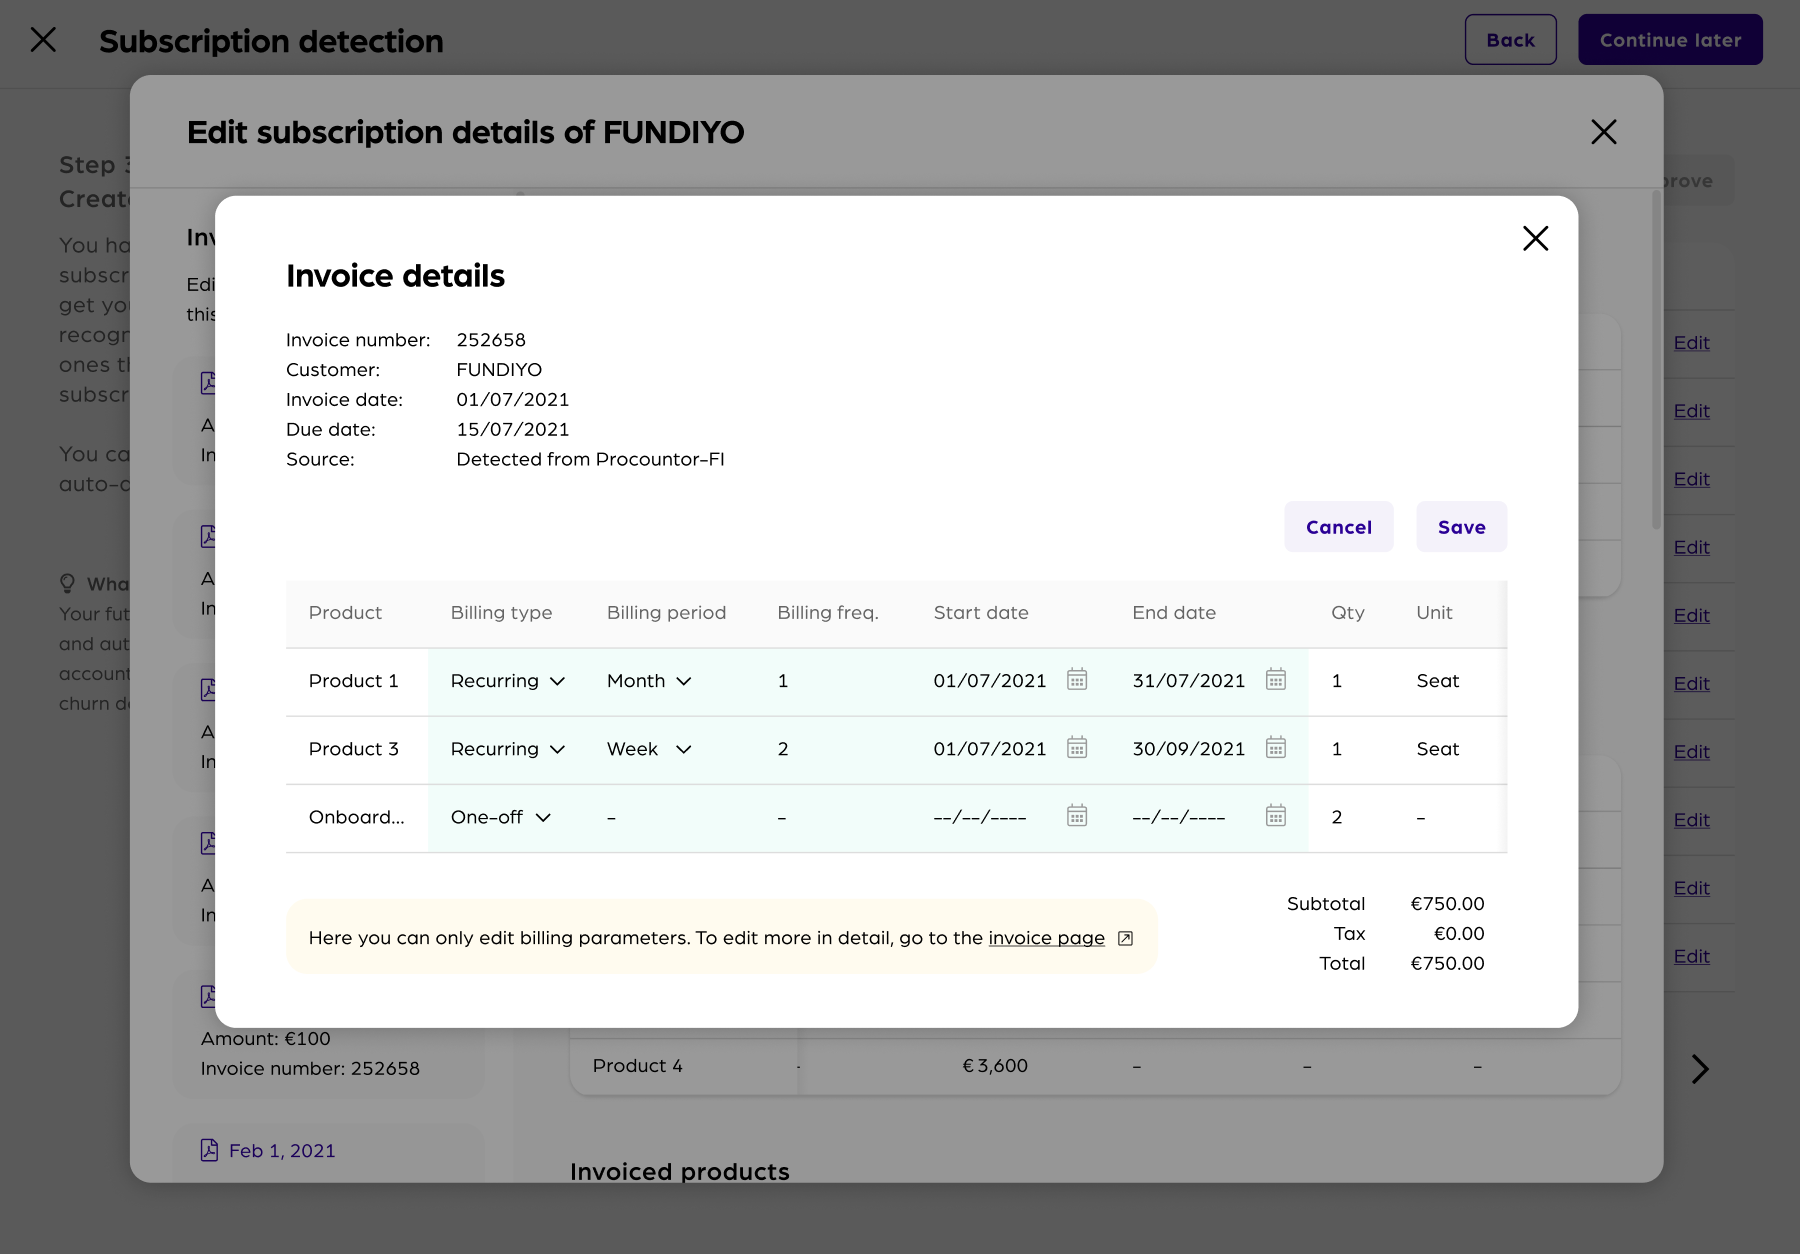
If you click on one invoice you can see all details related to this invoice. All indicated fields are pre-filled based on the data that was imported from your accounting software and the default values that were inputted in the previous steps. By clicking Edit you are able to change the information.
You can now change the Billing type, Billing period, Billing frequency, Start date and the End date.
Since the date has been imported from your accounting software and we must avoid discrepancies you cannot edit:
- Quantity
- Unit
- Unit price
- Discount
- Tax
- Billed
- MRR
in this mode. If you want to edit this data you have to adjust the information in your accounting software.
Confirm your changes with Save.
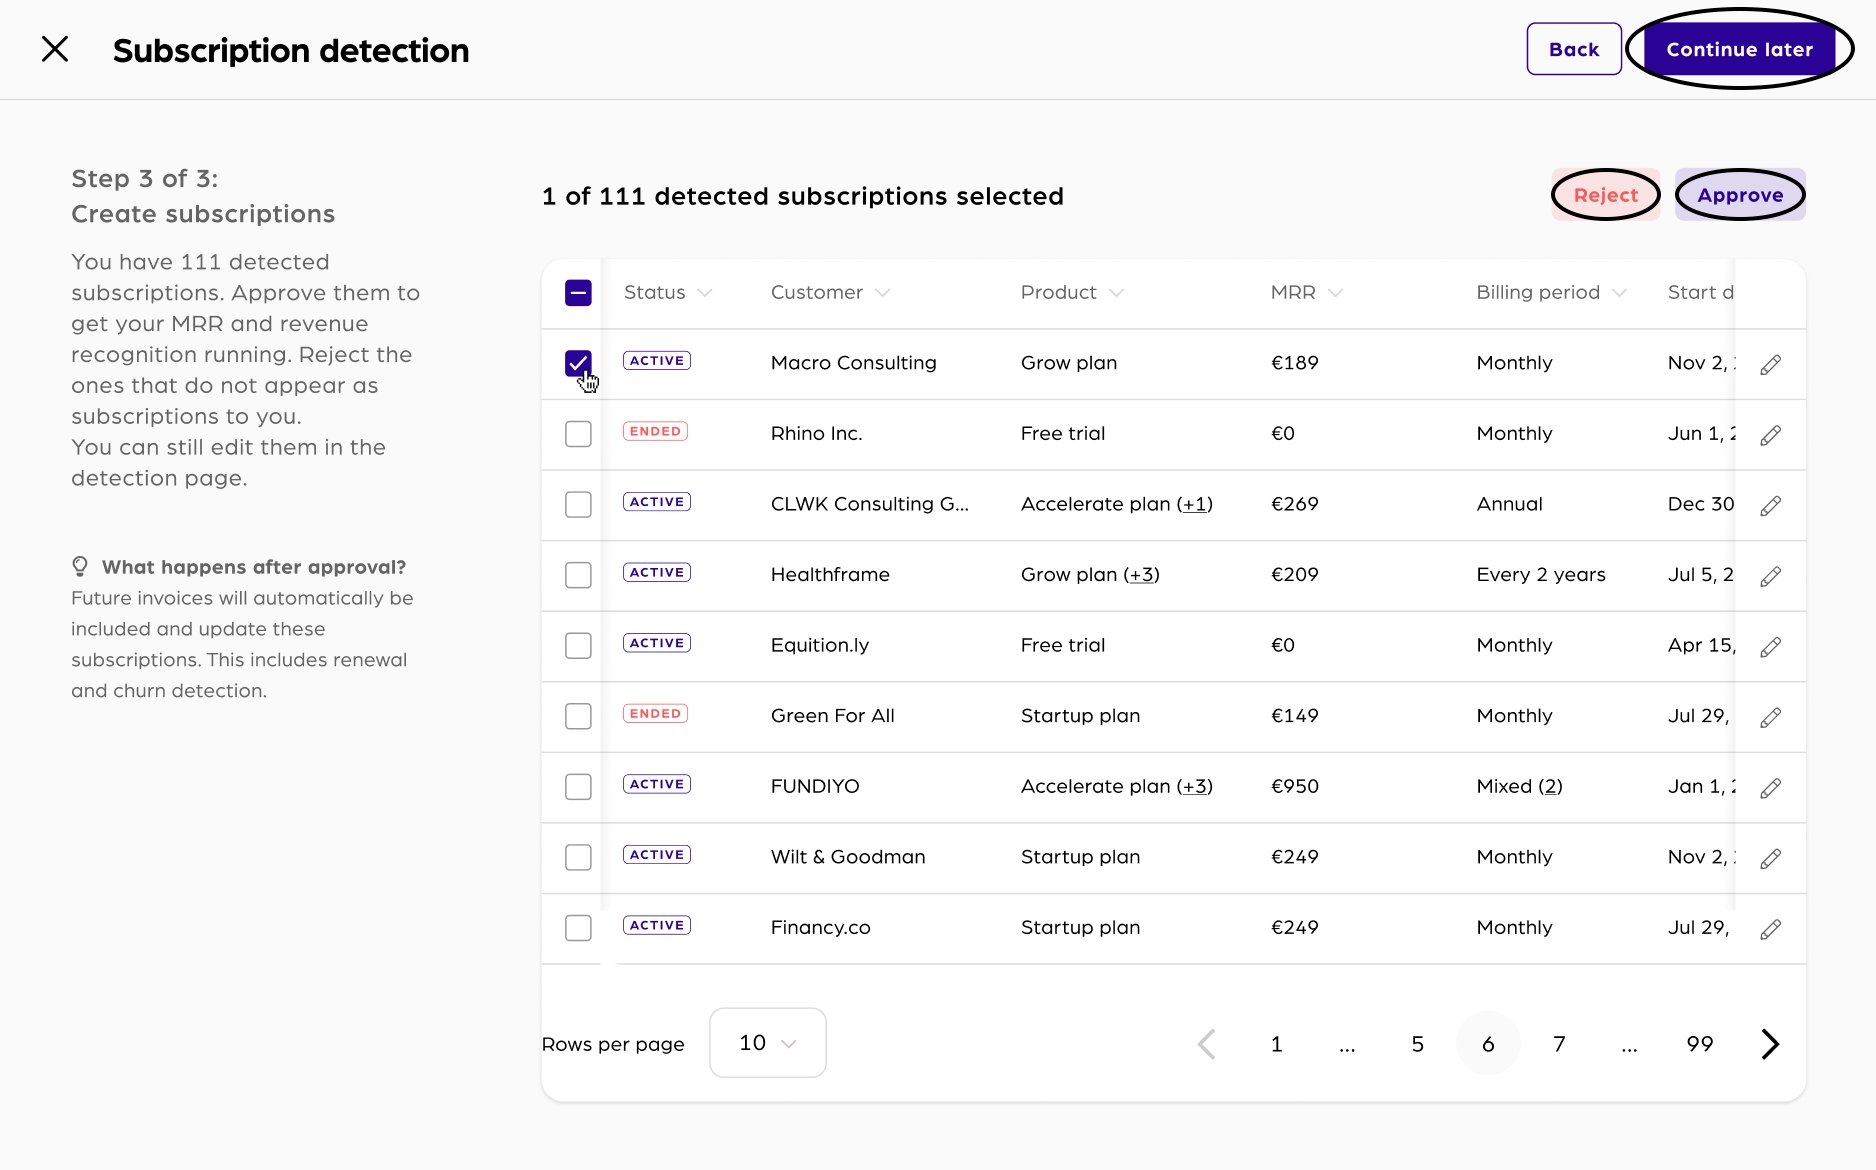
The next step is to Approve or Reject the detected subscriptions so they can appear in your MRR analytics. Therefore tick the subscription(s) and click either Approve or Reject. For the approved subscriptions, invoices related to this customer will automatically be assigned to the subscription in the future.
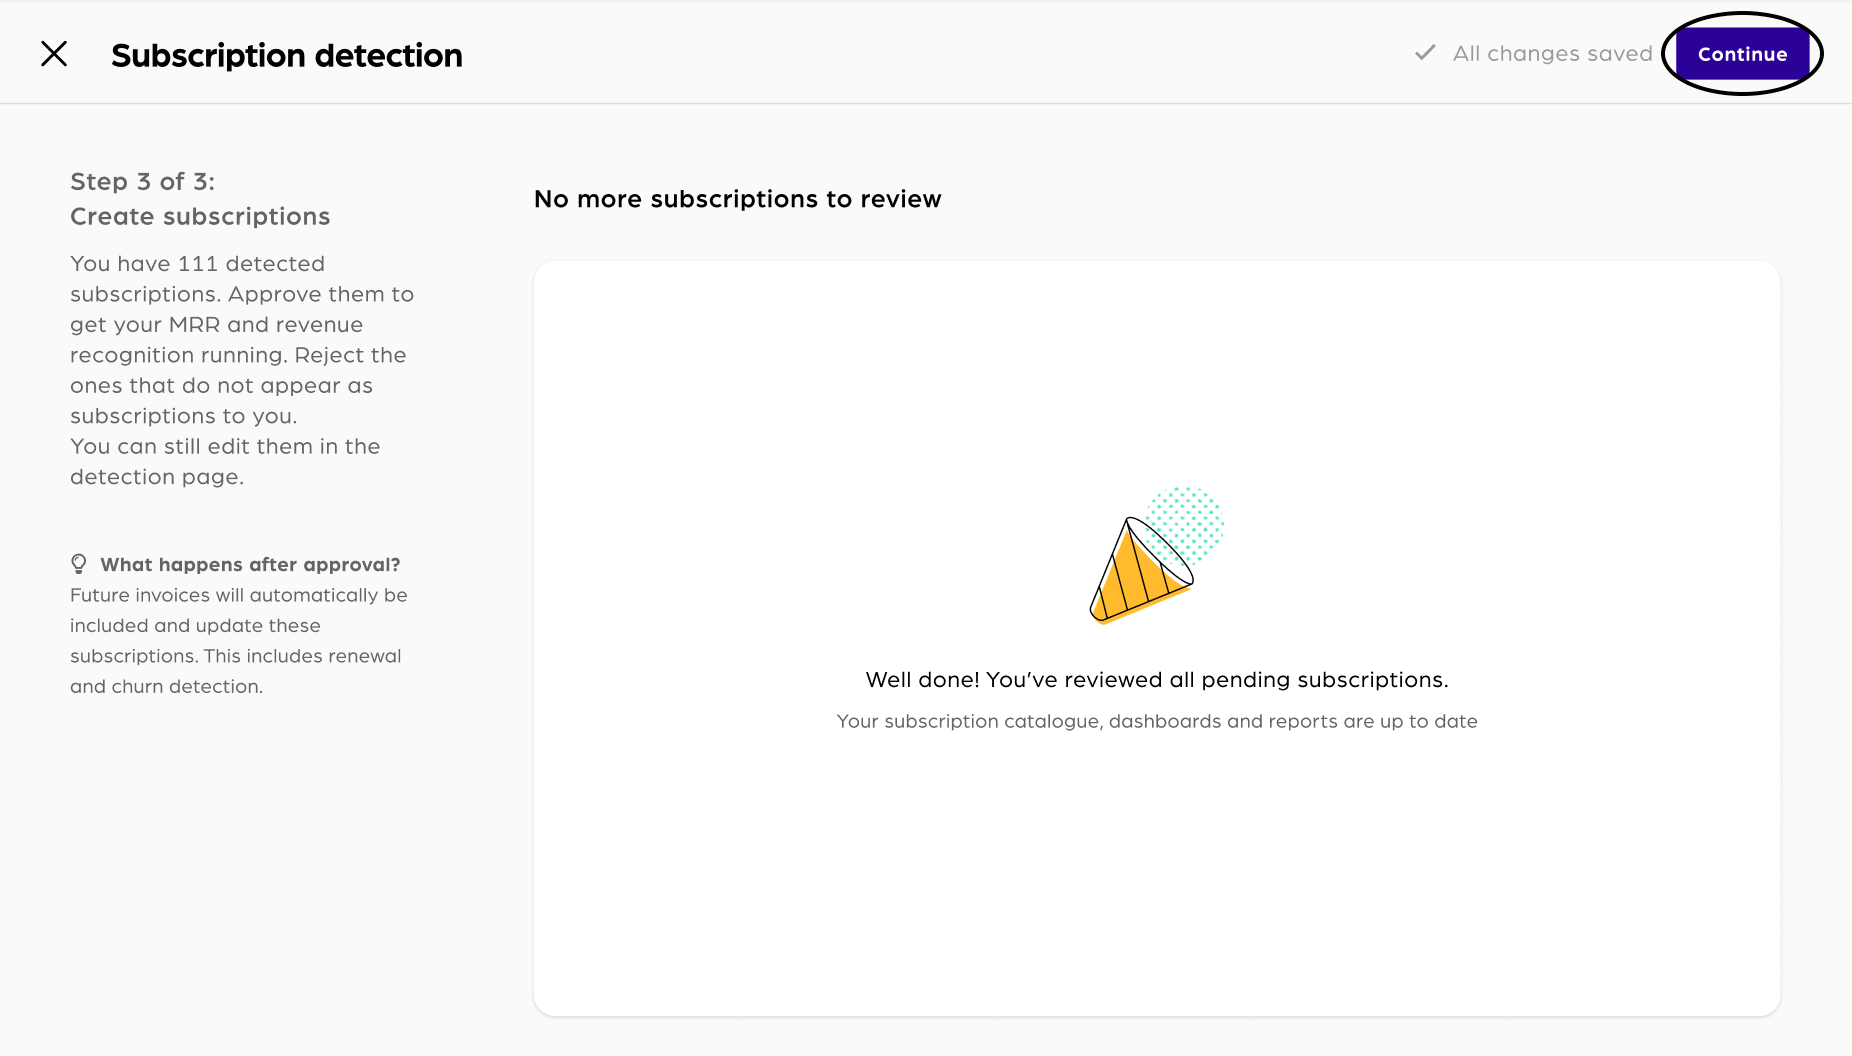
If you have either approved or rejected all subscriptions, you will see the message No more subscriptions to review. All future invoices will automatically be included and update the subscriptions you have approved. Finish the process with Continue.
That's it, you are done! Check your dashboards and see your subscriptions flowing in.
Updated about 3 years ago
