Subscription Autodetection
Customers and Subscriptions
Subscription detection creates SaaS metrics, subscription data and revenue recognition out of the invoices that are issued from your accounting software, such as Quickbooks, Xero and Procountor. Calqulate imports your customers, products and sales invoices from the accounting software.
Where to find the Subscription detection
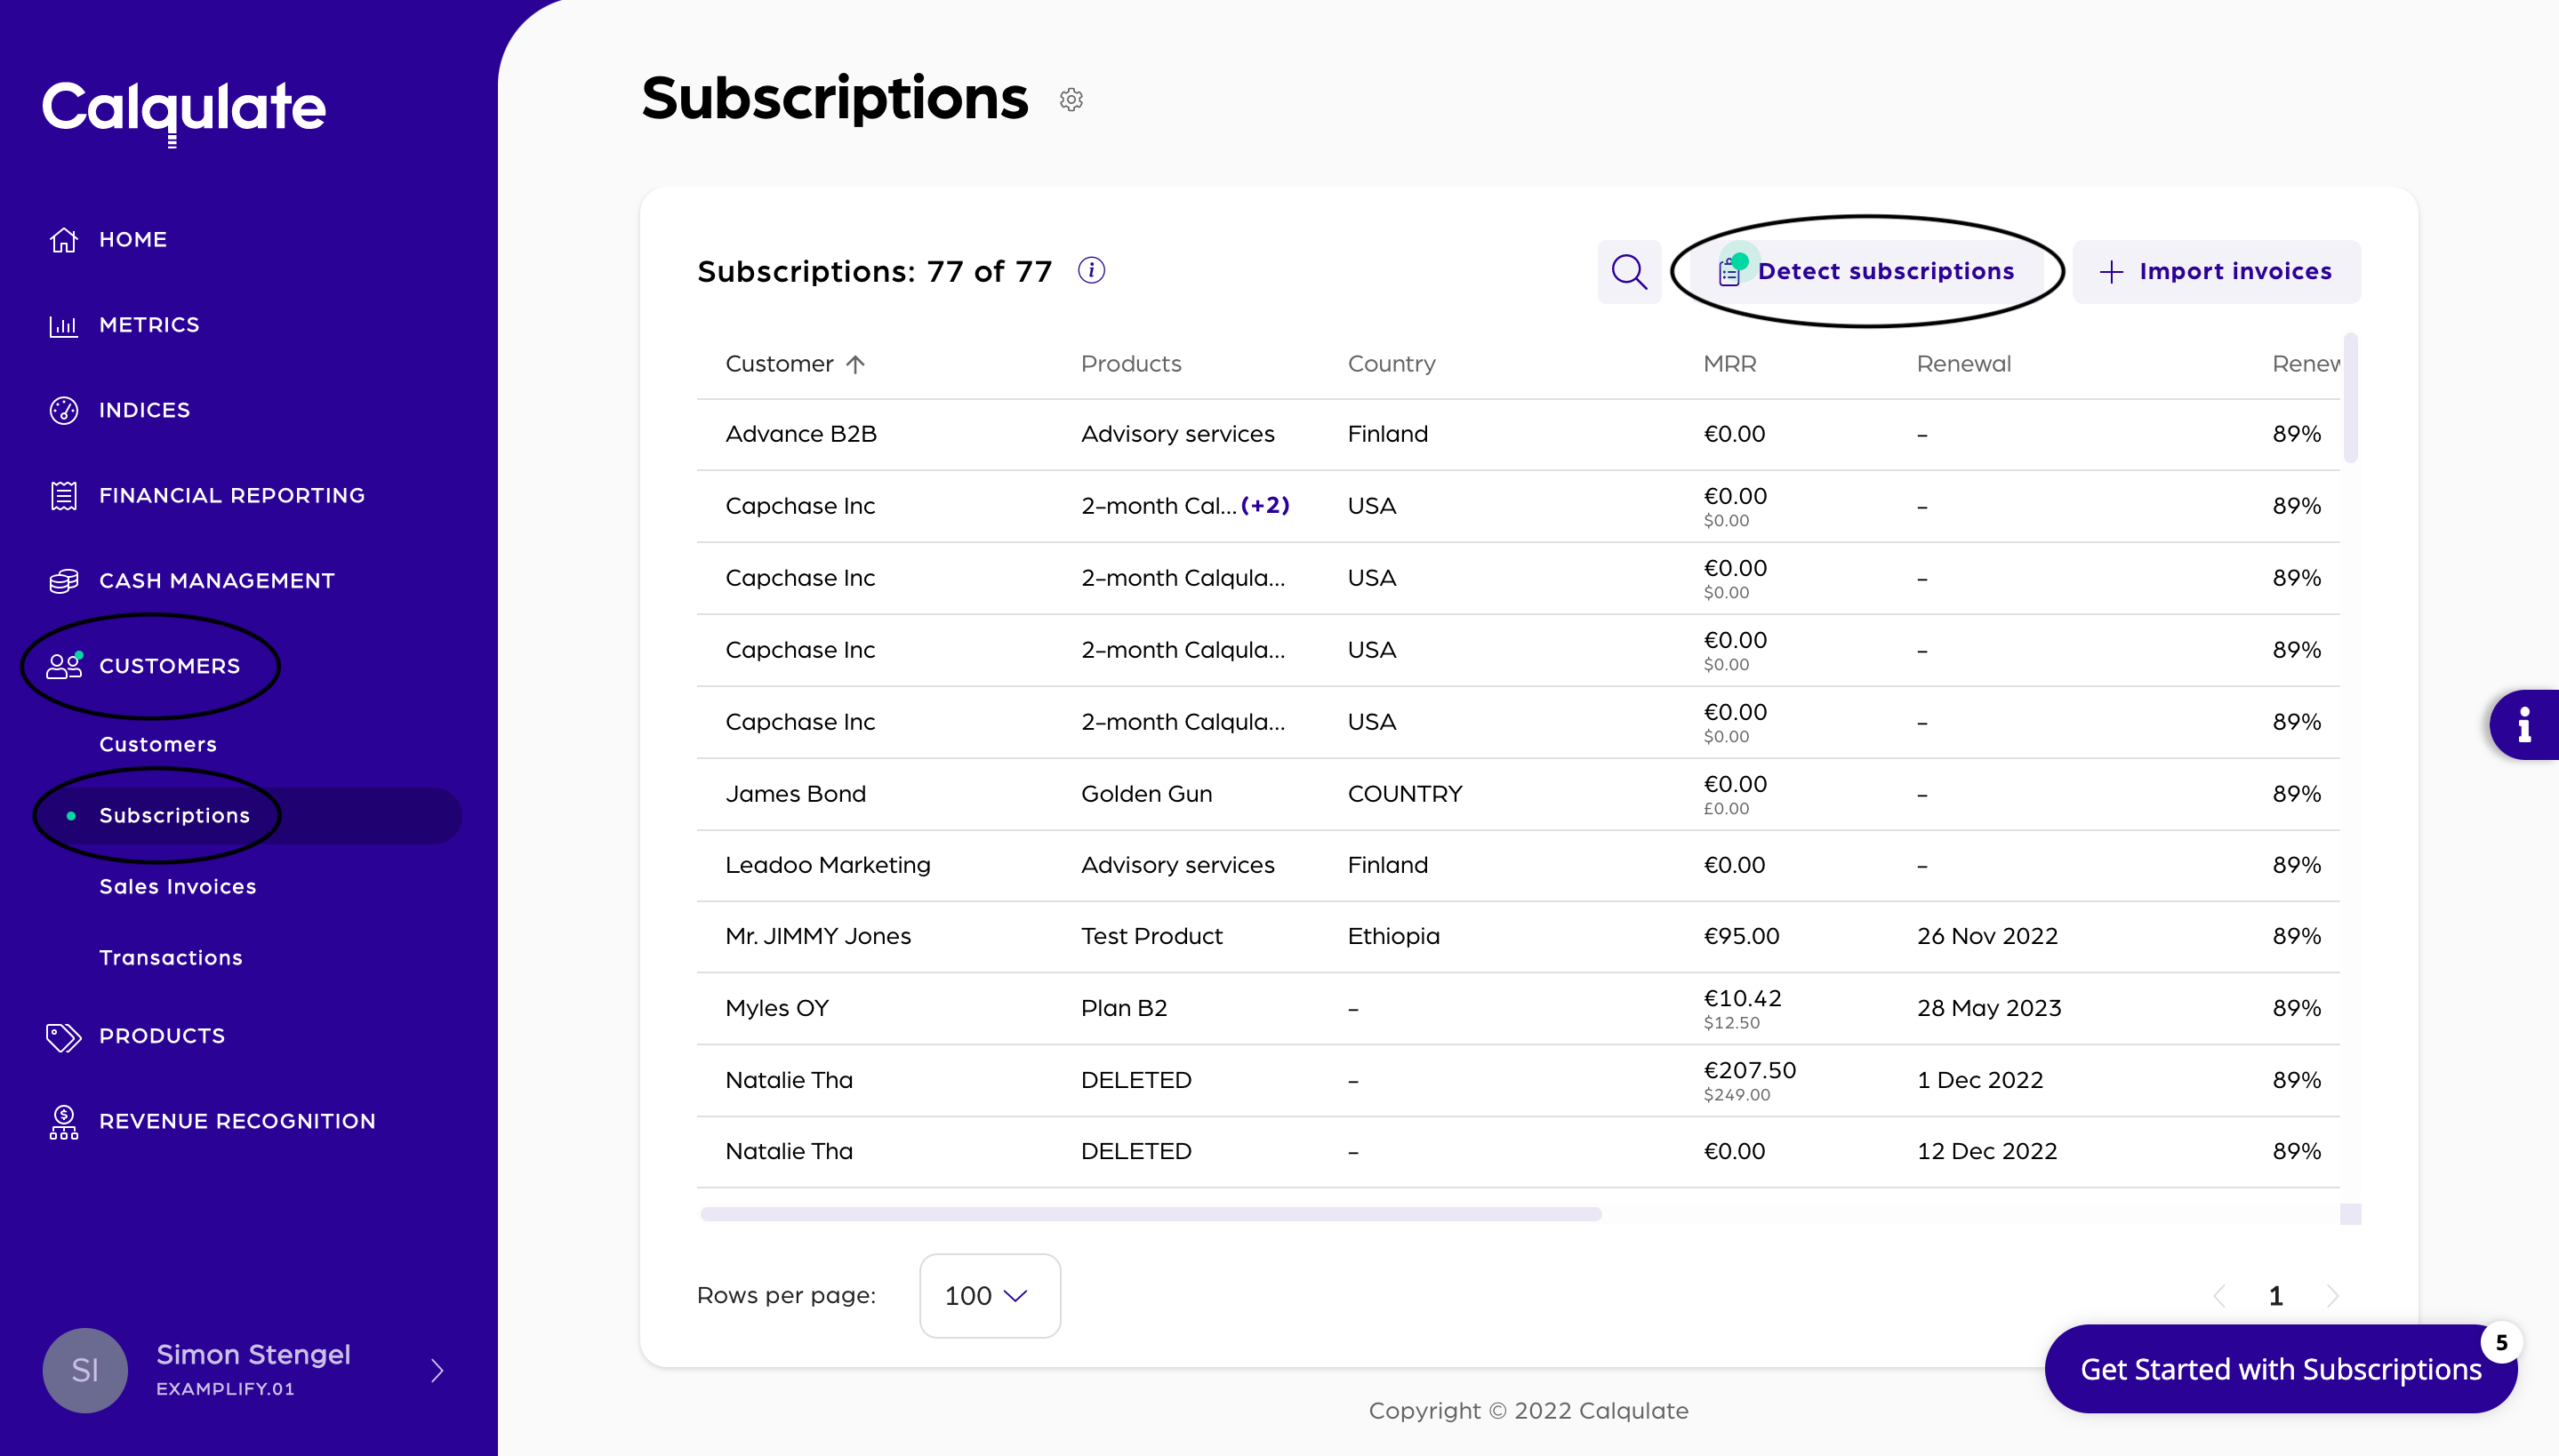
Go to the left-hand menu CUSTOMERS > Subscriptions and click Detect subscriptions.
Note: If you have not connected your Accounting or Subscription Management Software or have not imported Invoices and Products with CSV-files, do this first.
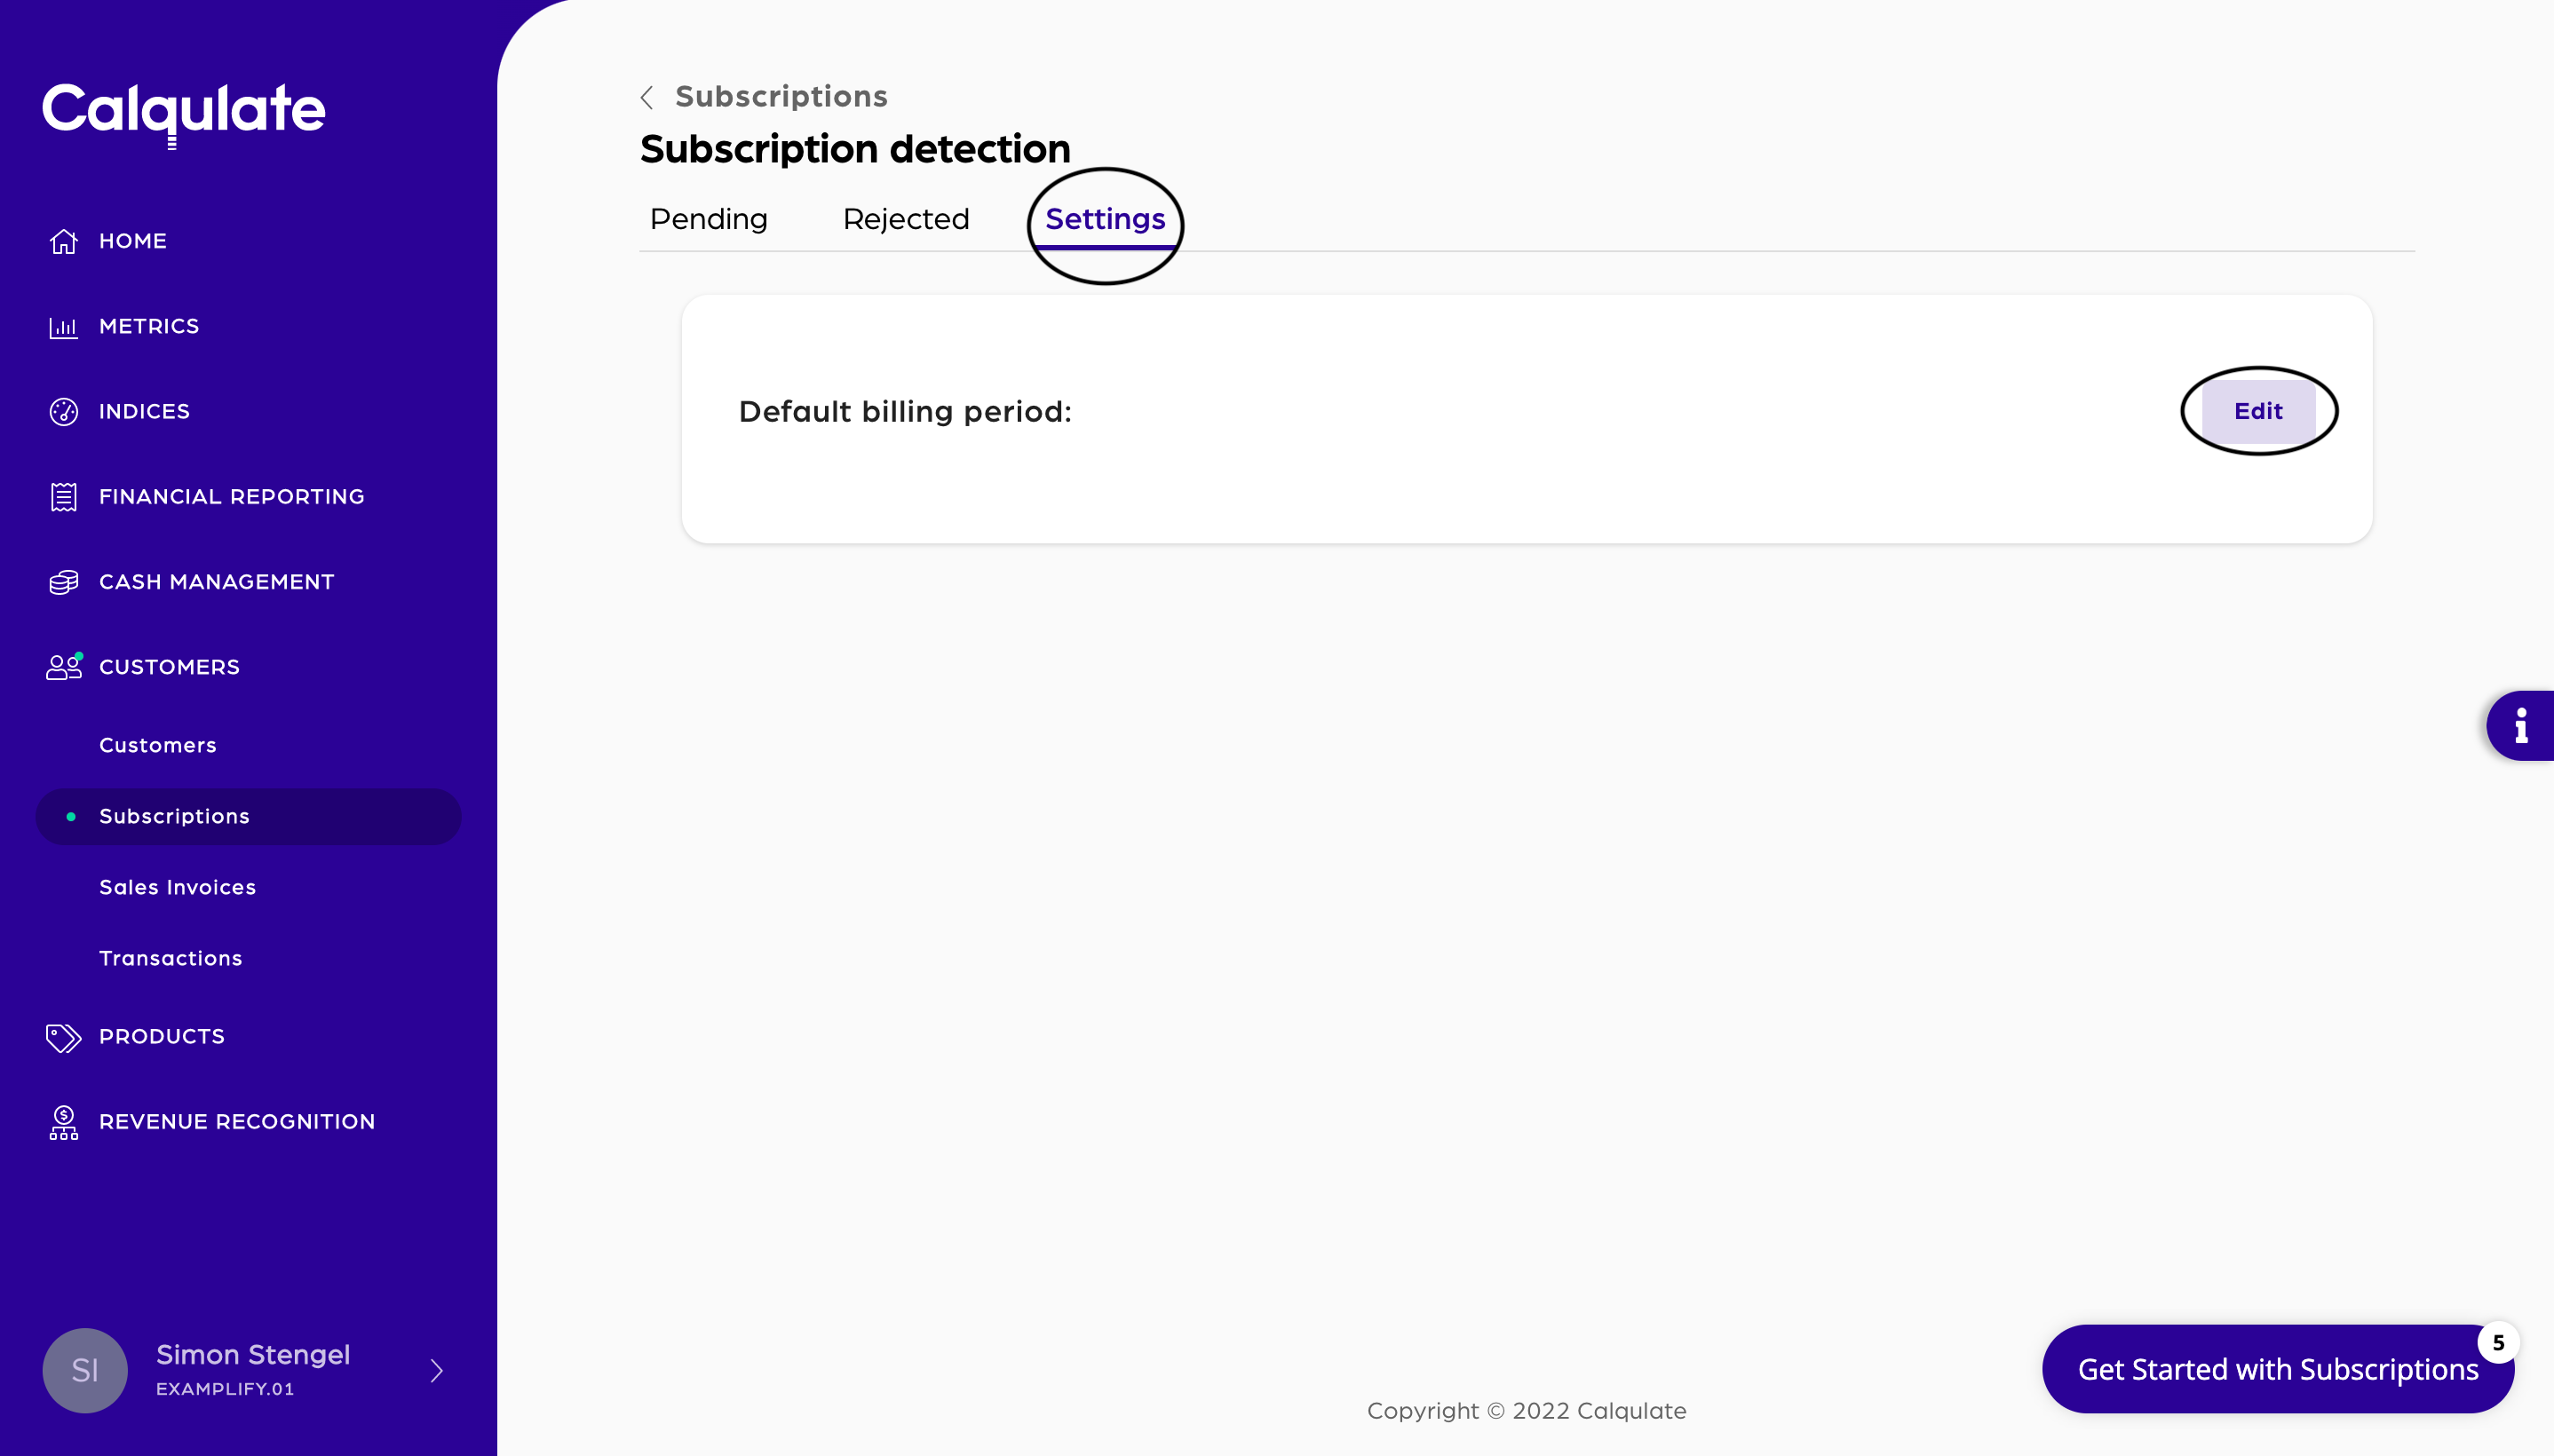
The first step is to set a default billing period for your subscriptions. The chosen period will be used as default value for all products and subscriptions, and it can be adjusted for each invoice later in the process. To do that choose the Settings tab. In the field Default billing period press Edit.
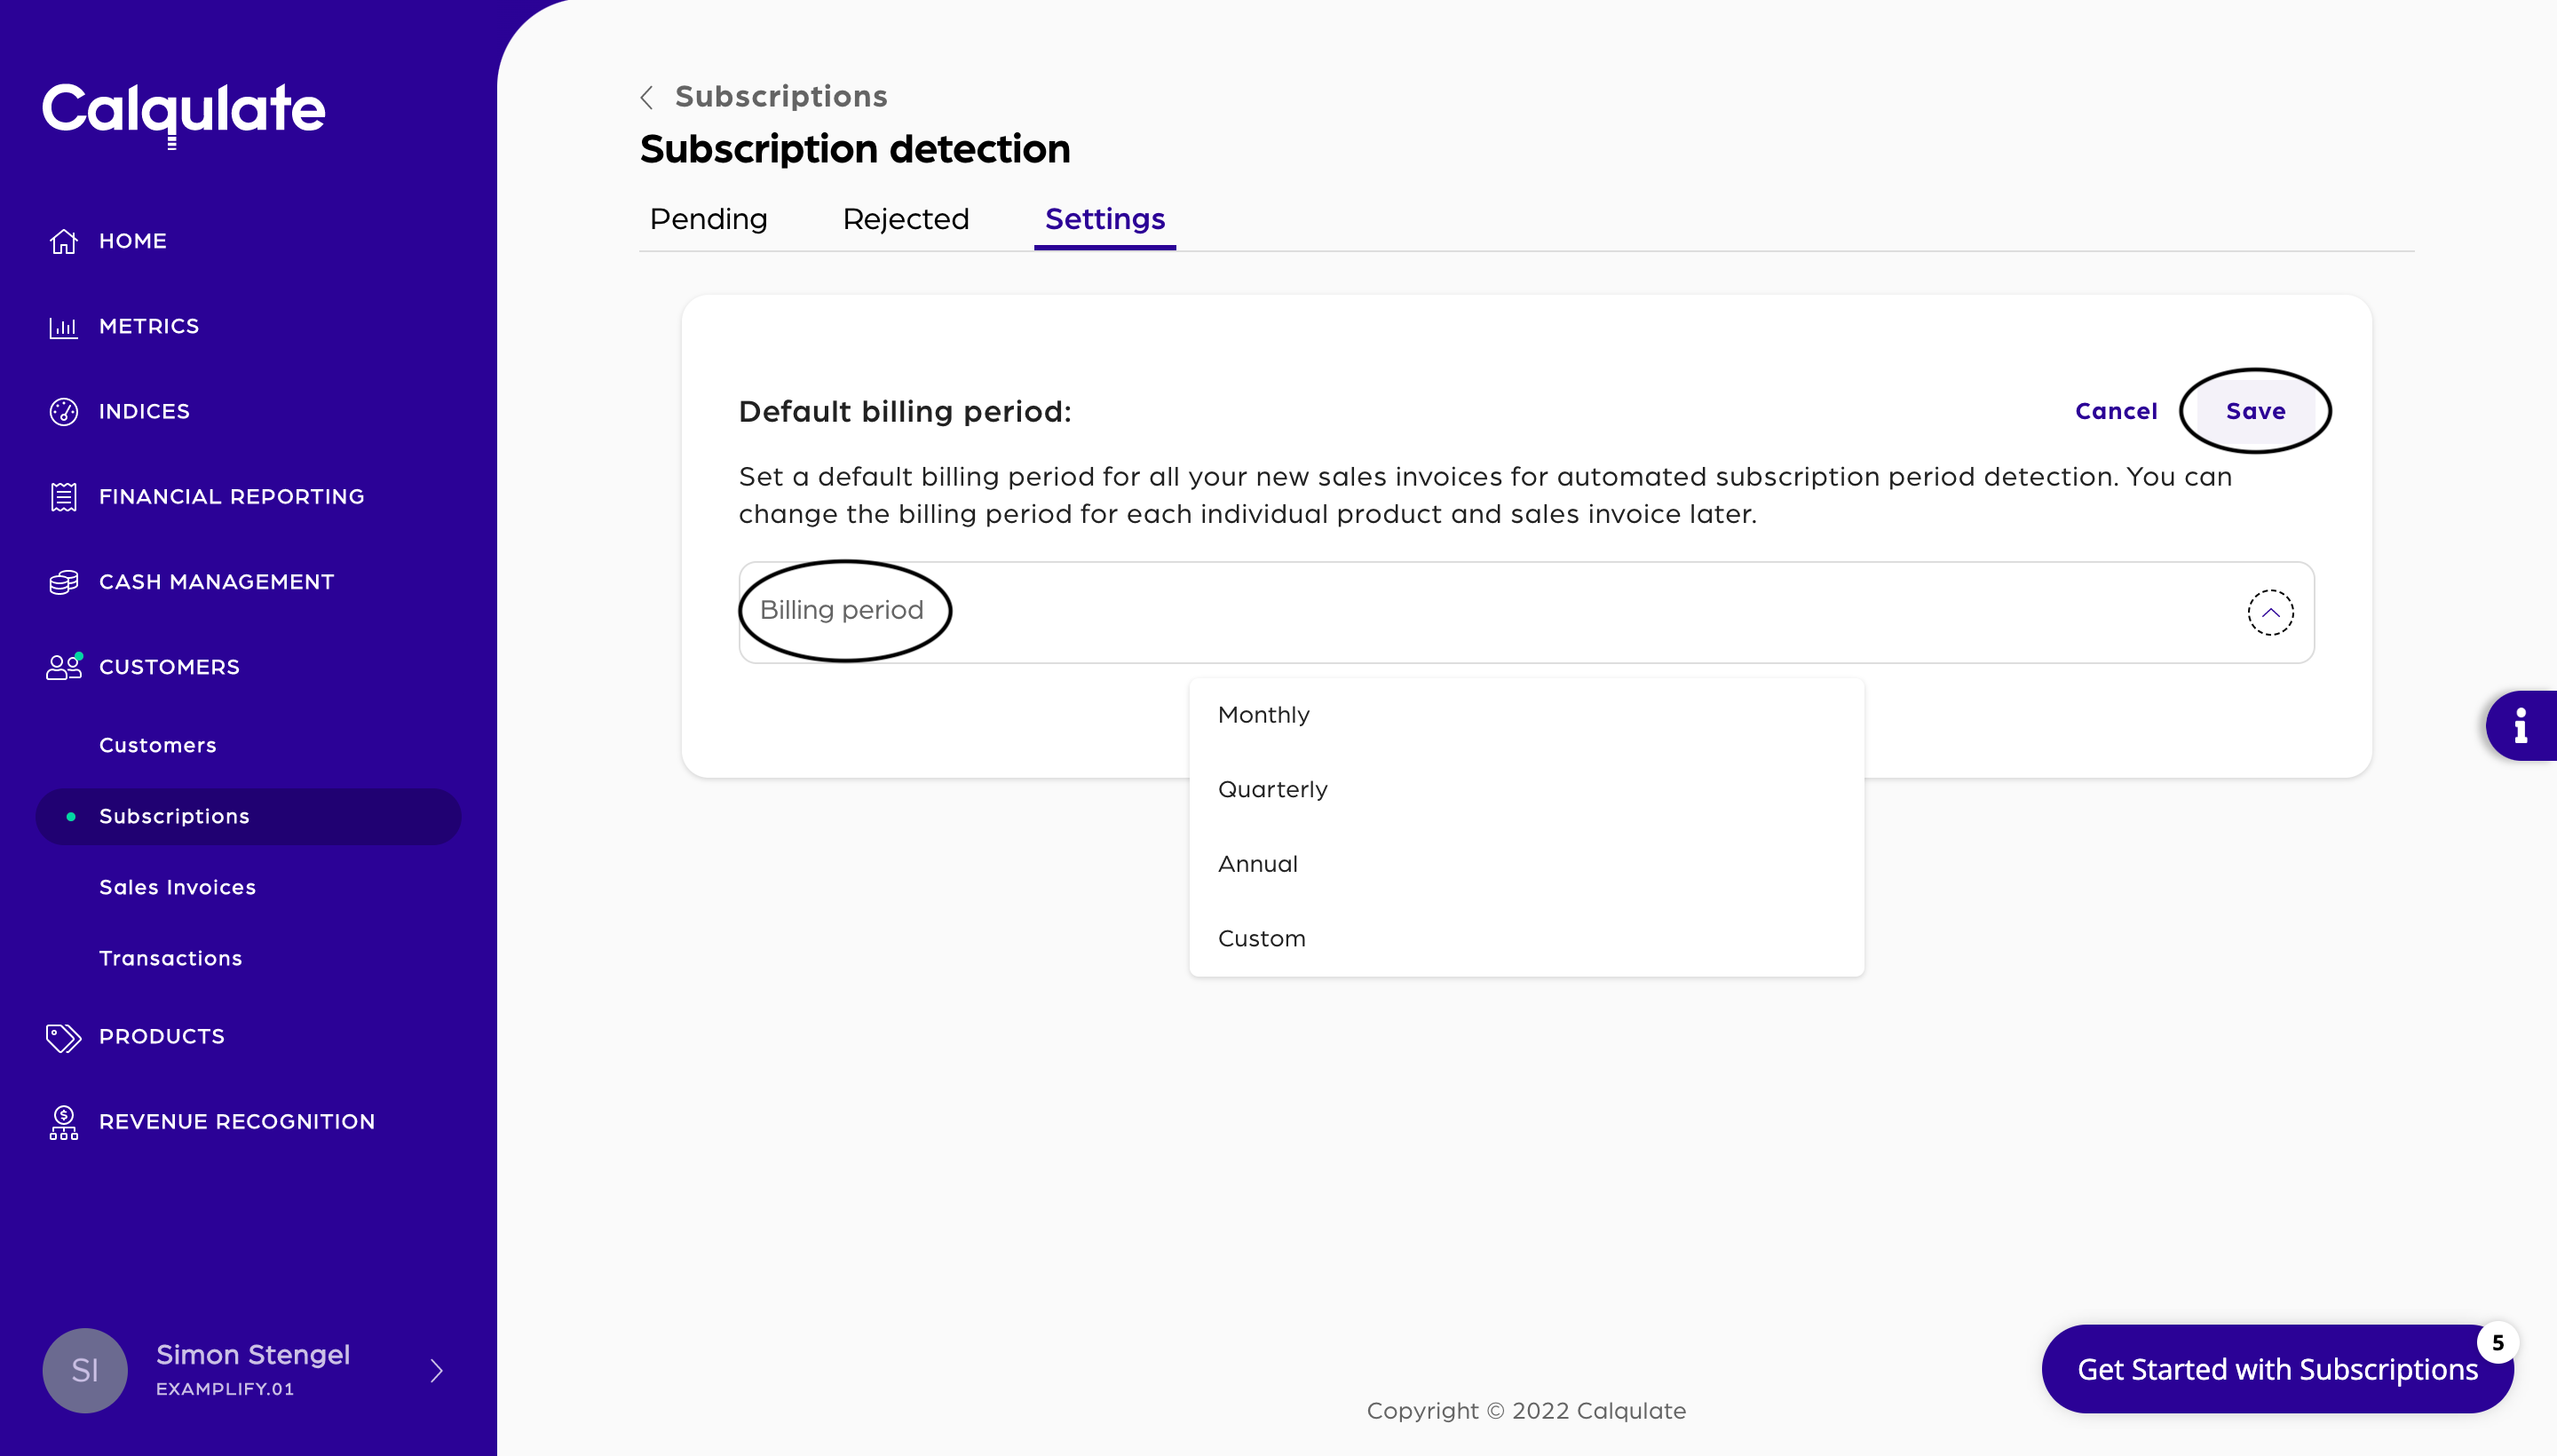
Click on Billing period and chose the desired period that will be set as default billing period for all new sales invoices from automated subscription period detection. Confirm with Save.
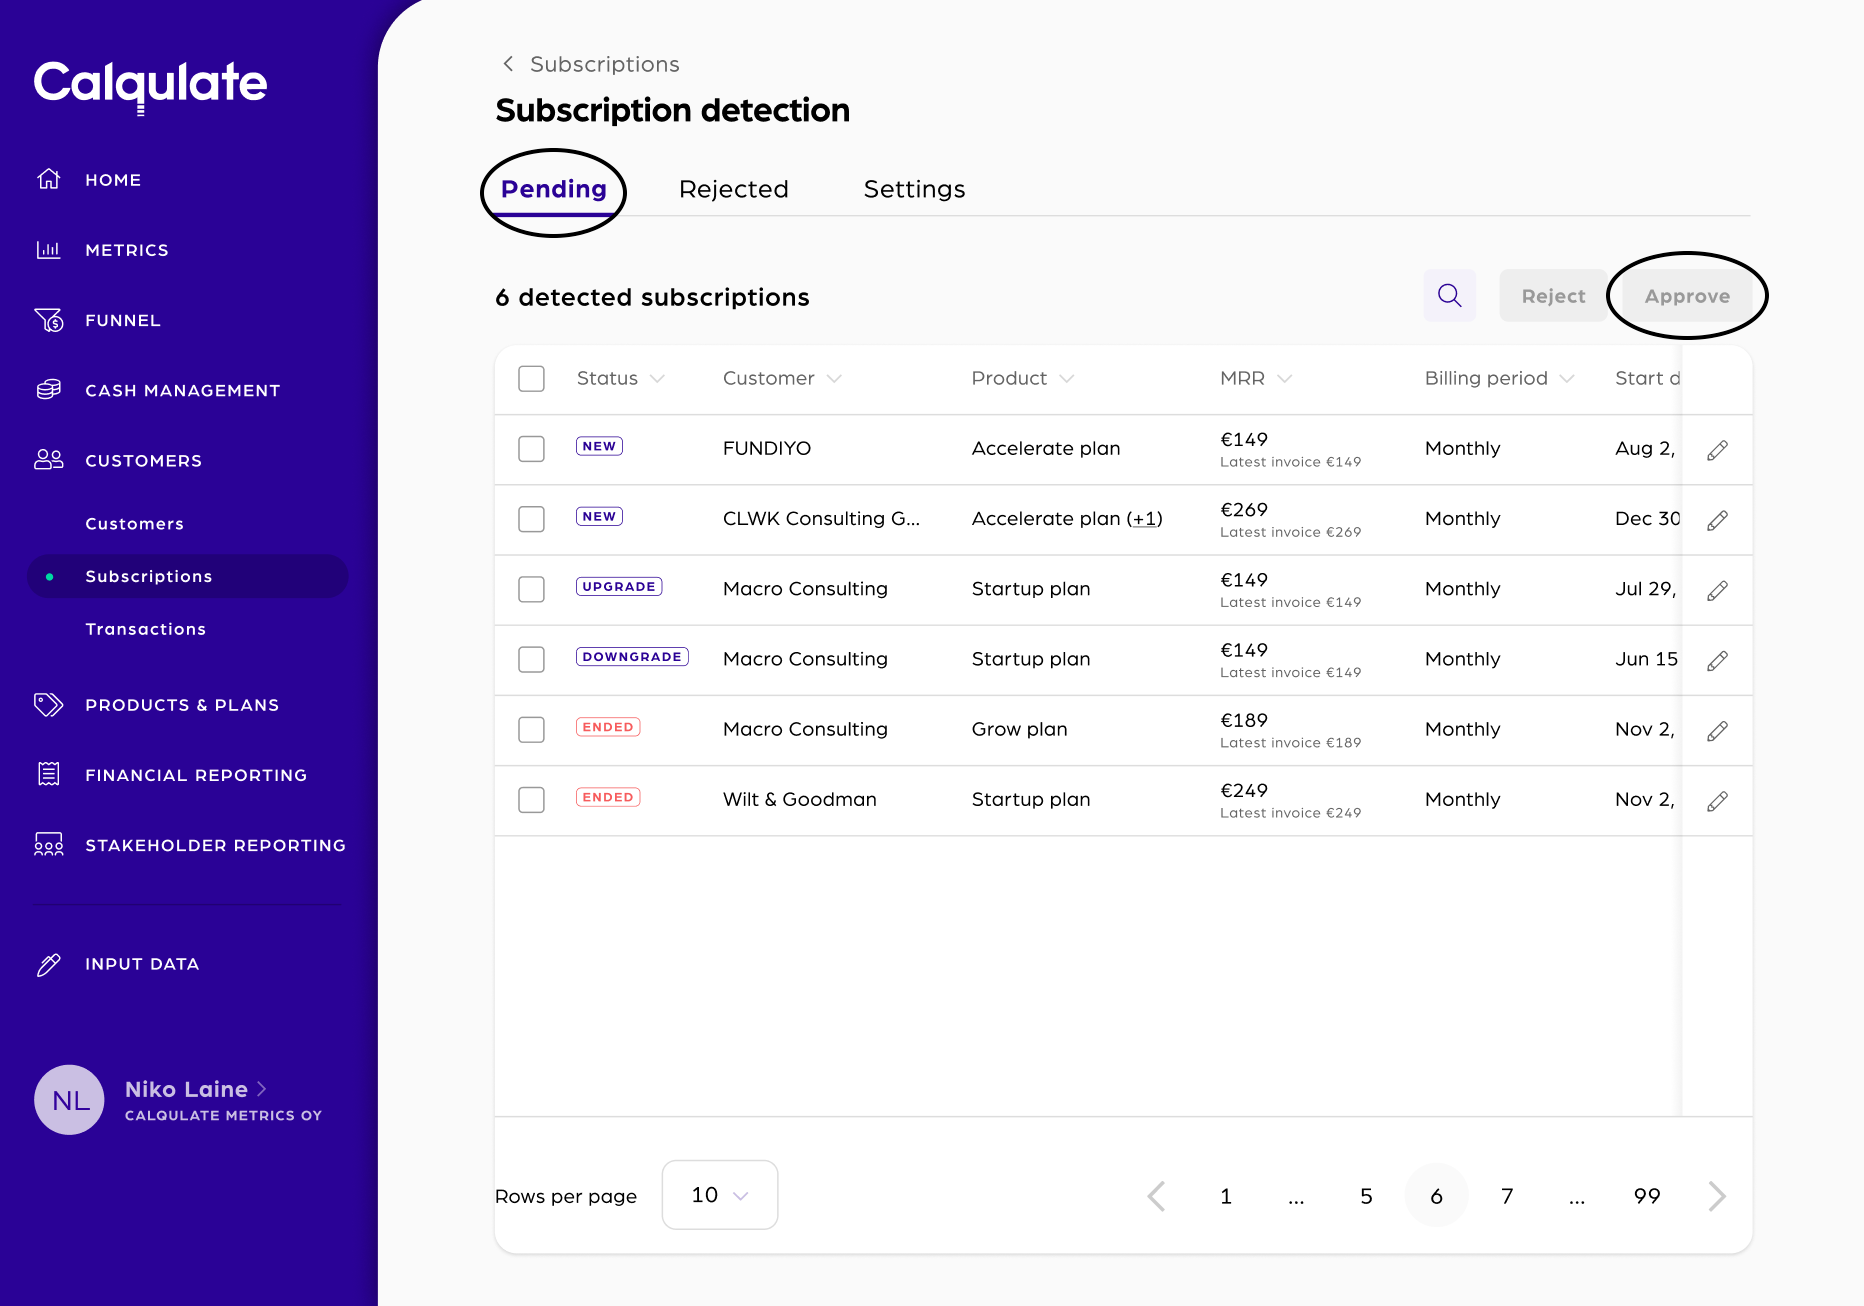
For editing the detected subscriptions go to the Pending tab. The subscriptions will be shown with one of the following statuses:
- New: new subscription
- Upgrade: value of subscription has increased
- Downgrade: value of subscription has decreased
- Ended: billing period has already ended
To approve one or more subscriptions, tick them and press Approve. Rejecting subscriptions works in the same way.
In the tab Rejected you can see a list of all subscriptions that have been rejected.
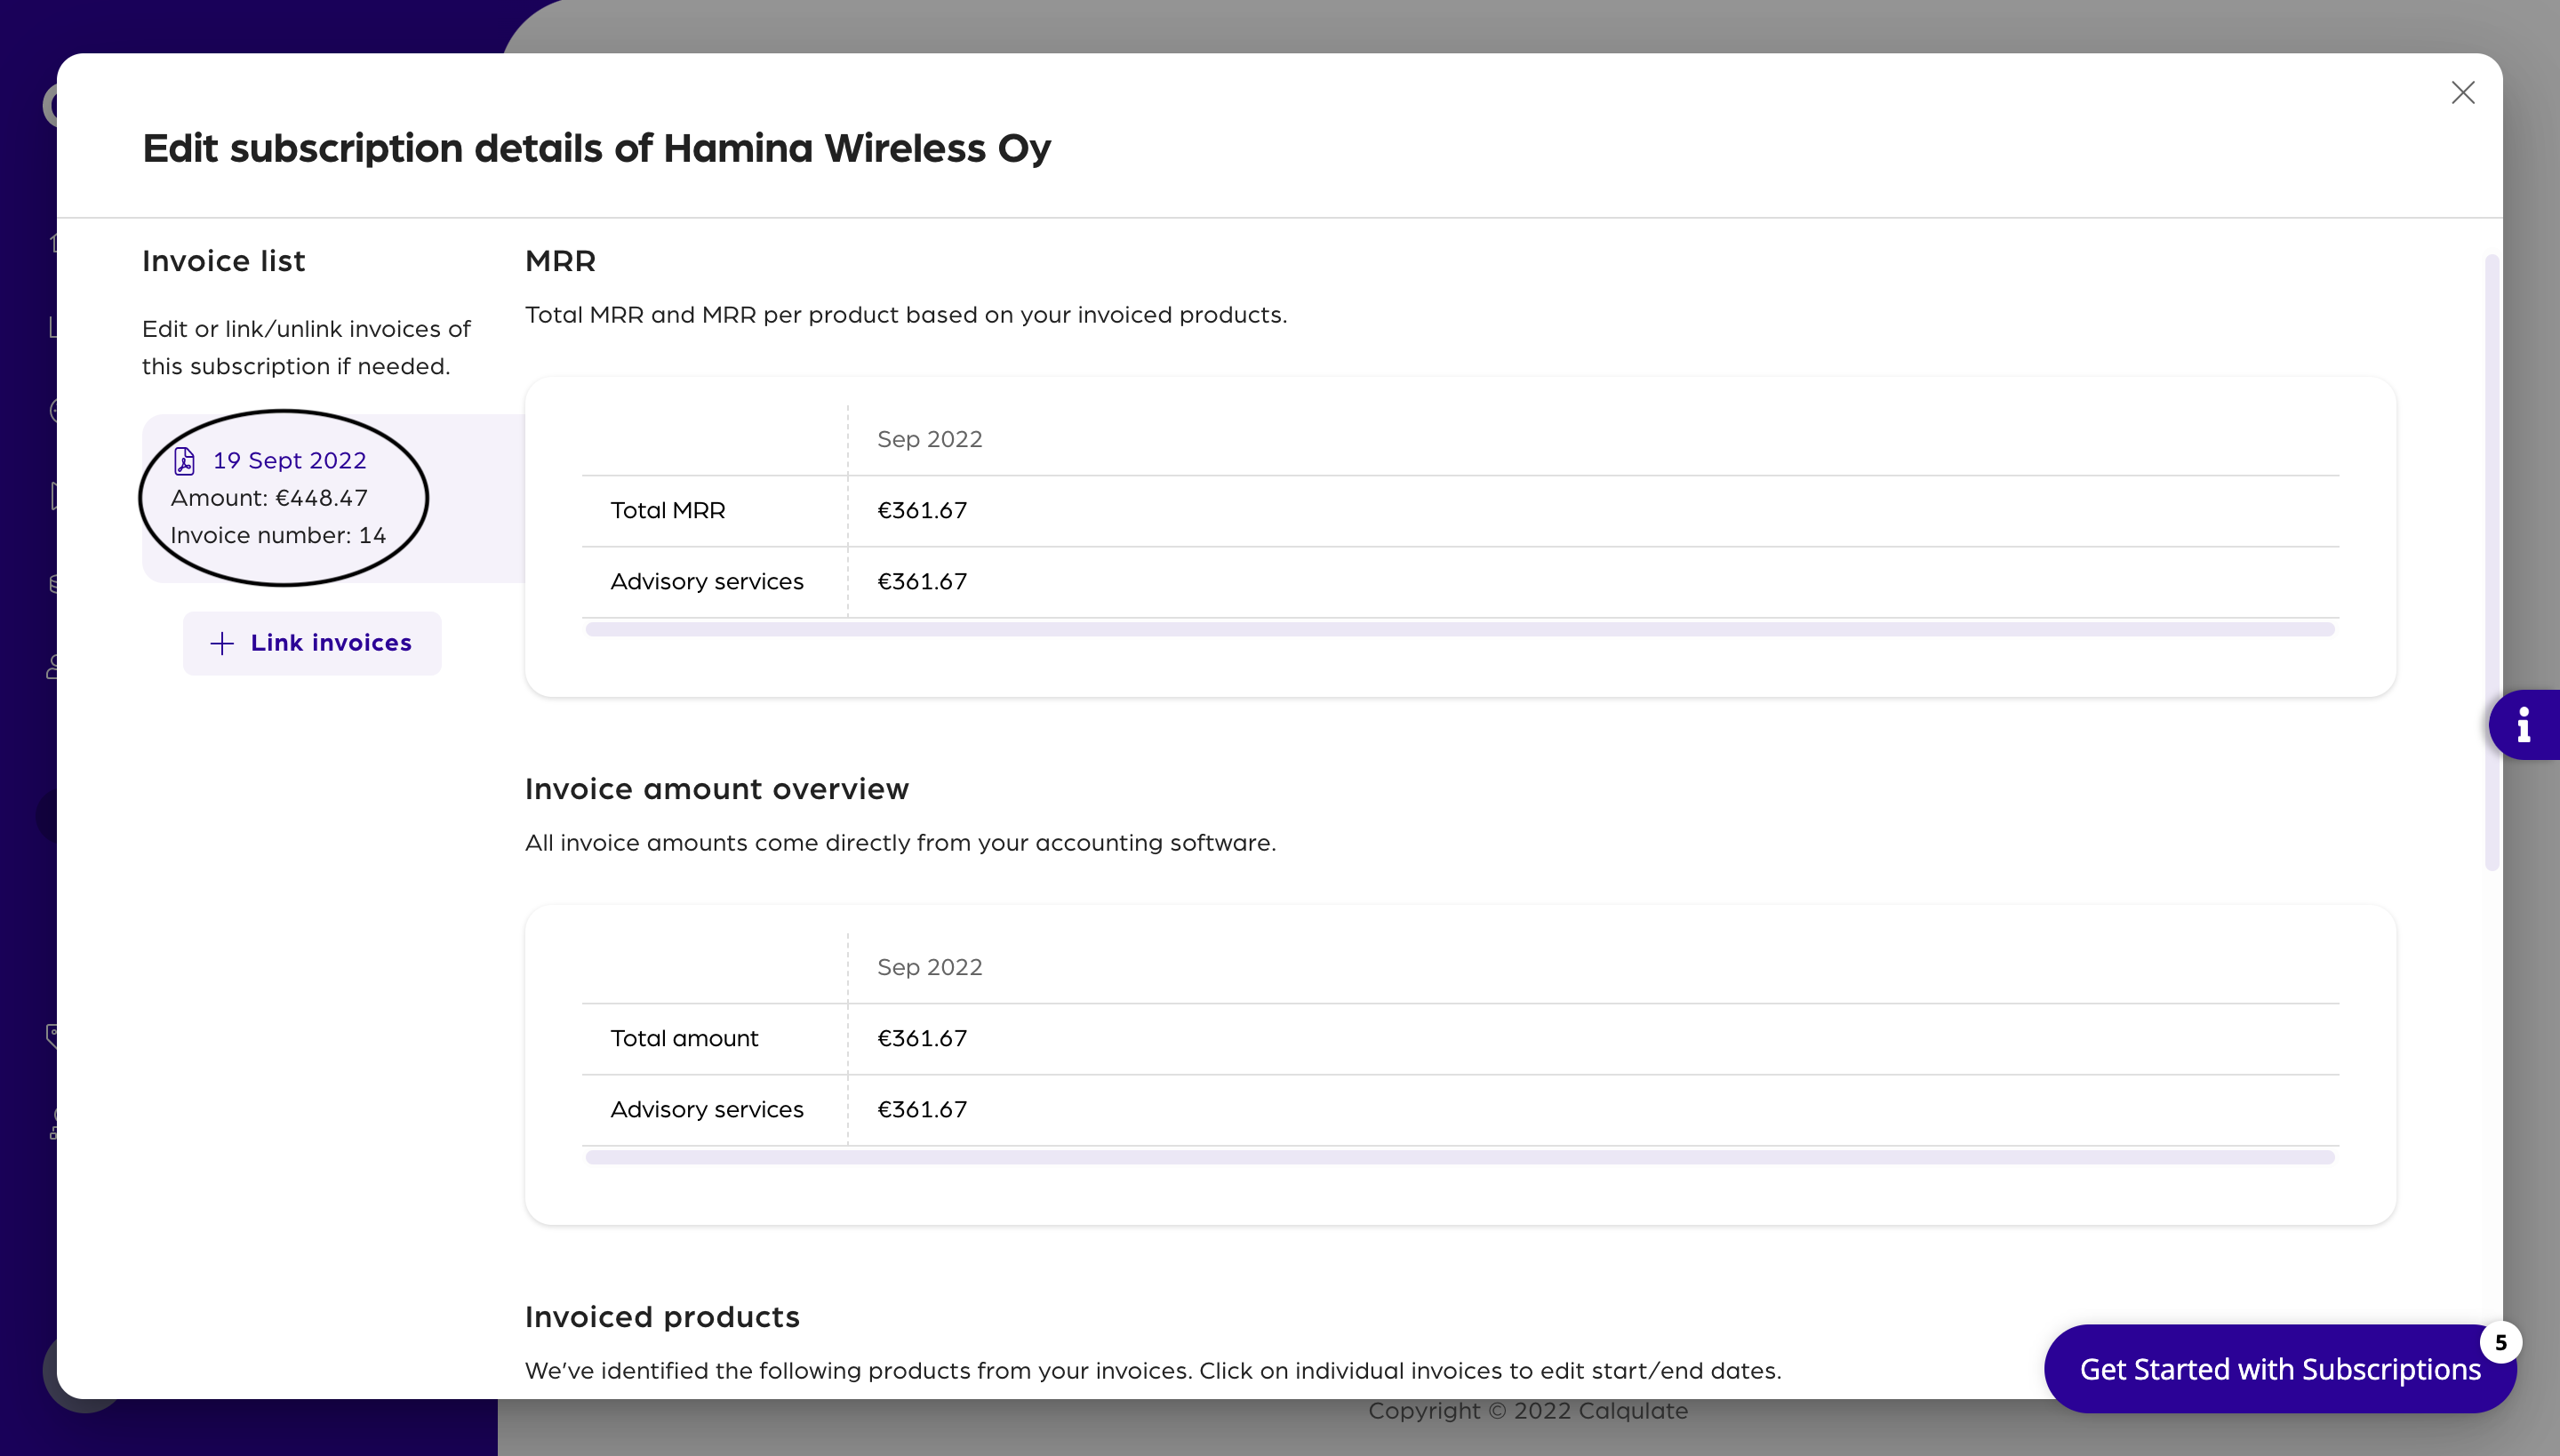
To see more details about an information or edit the information, press the Pencil icon on the right side of the screen.
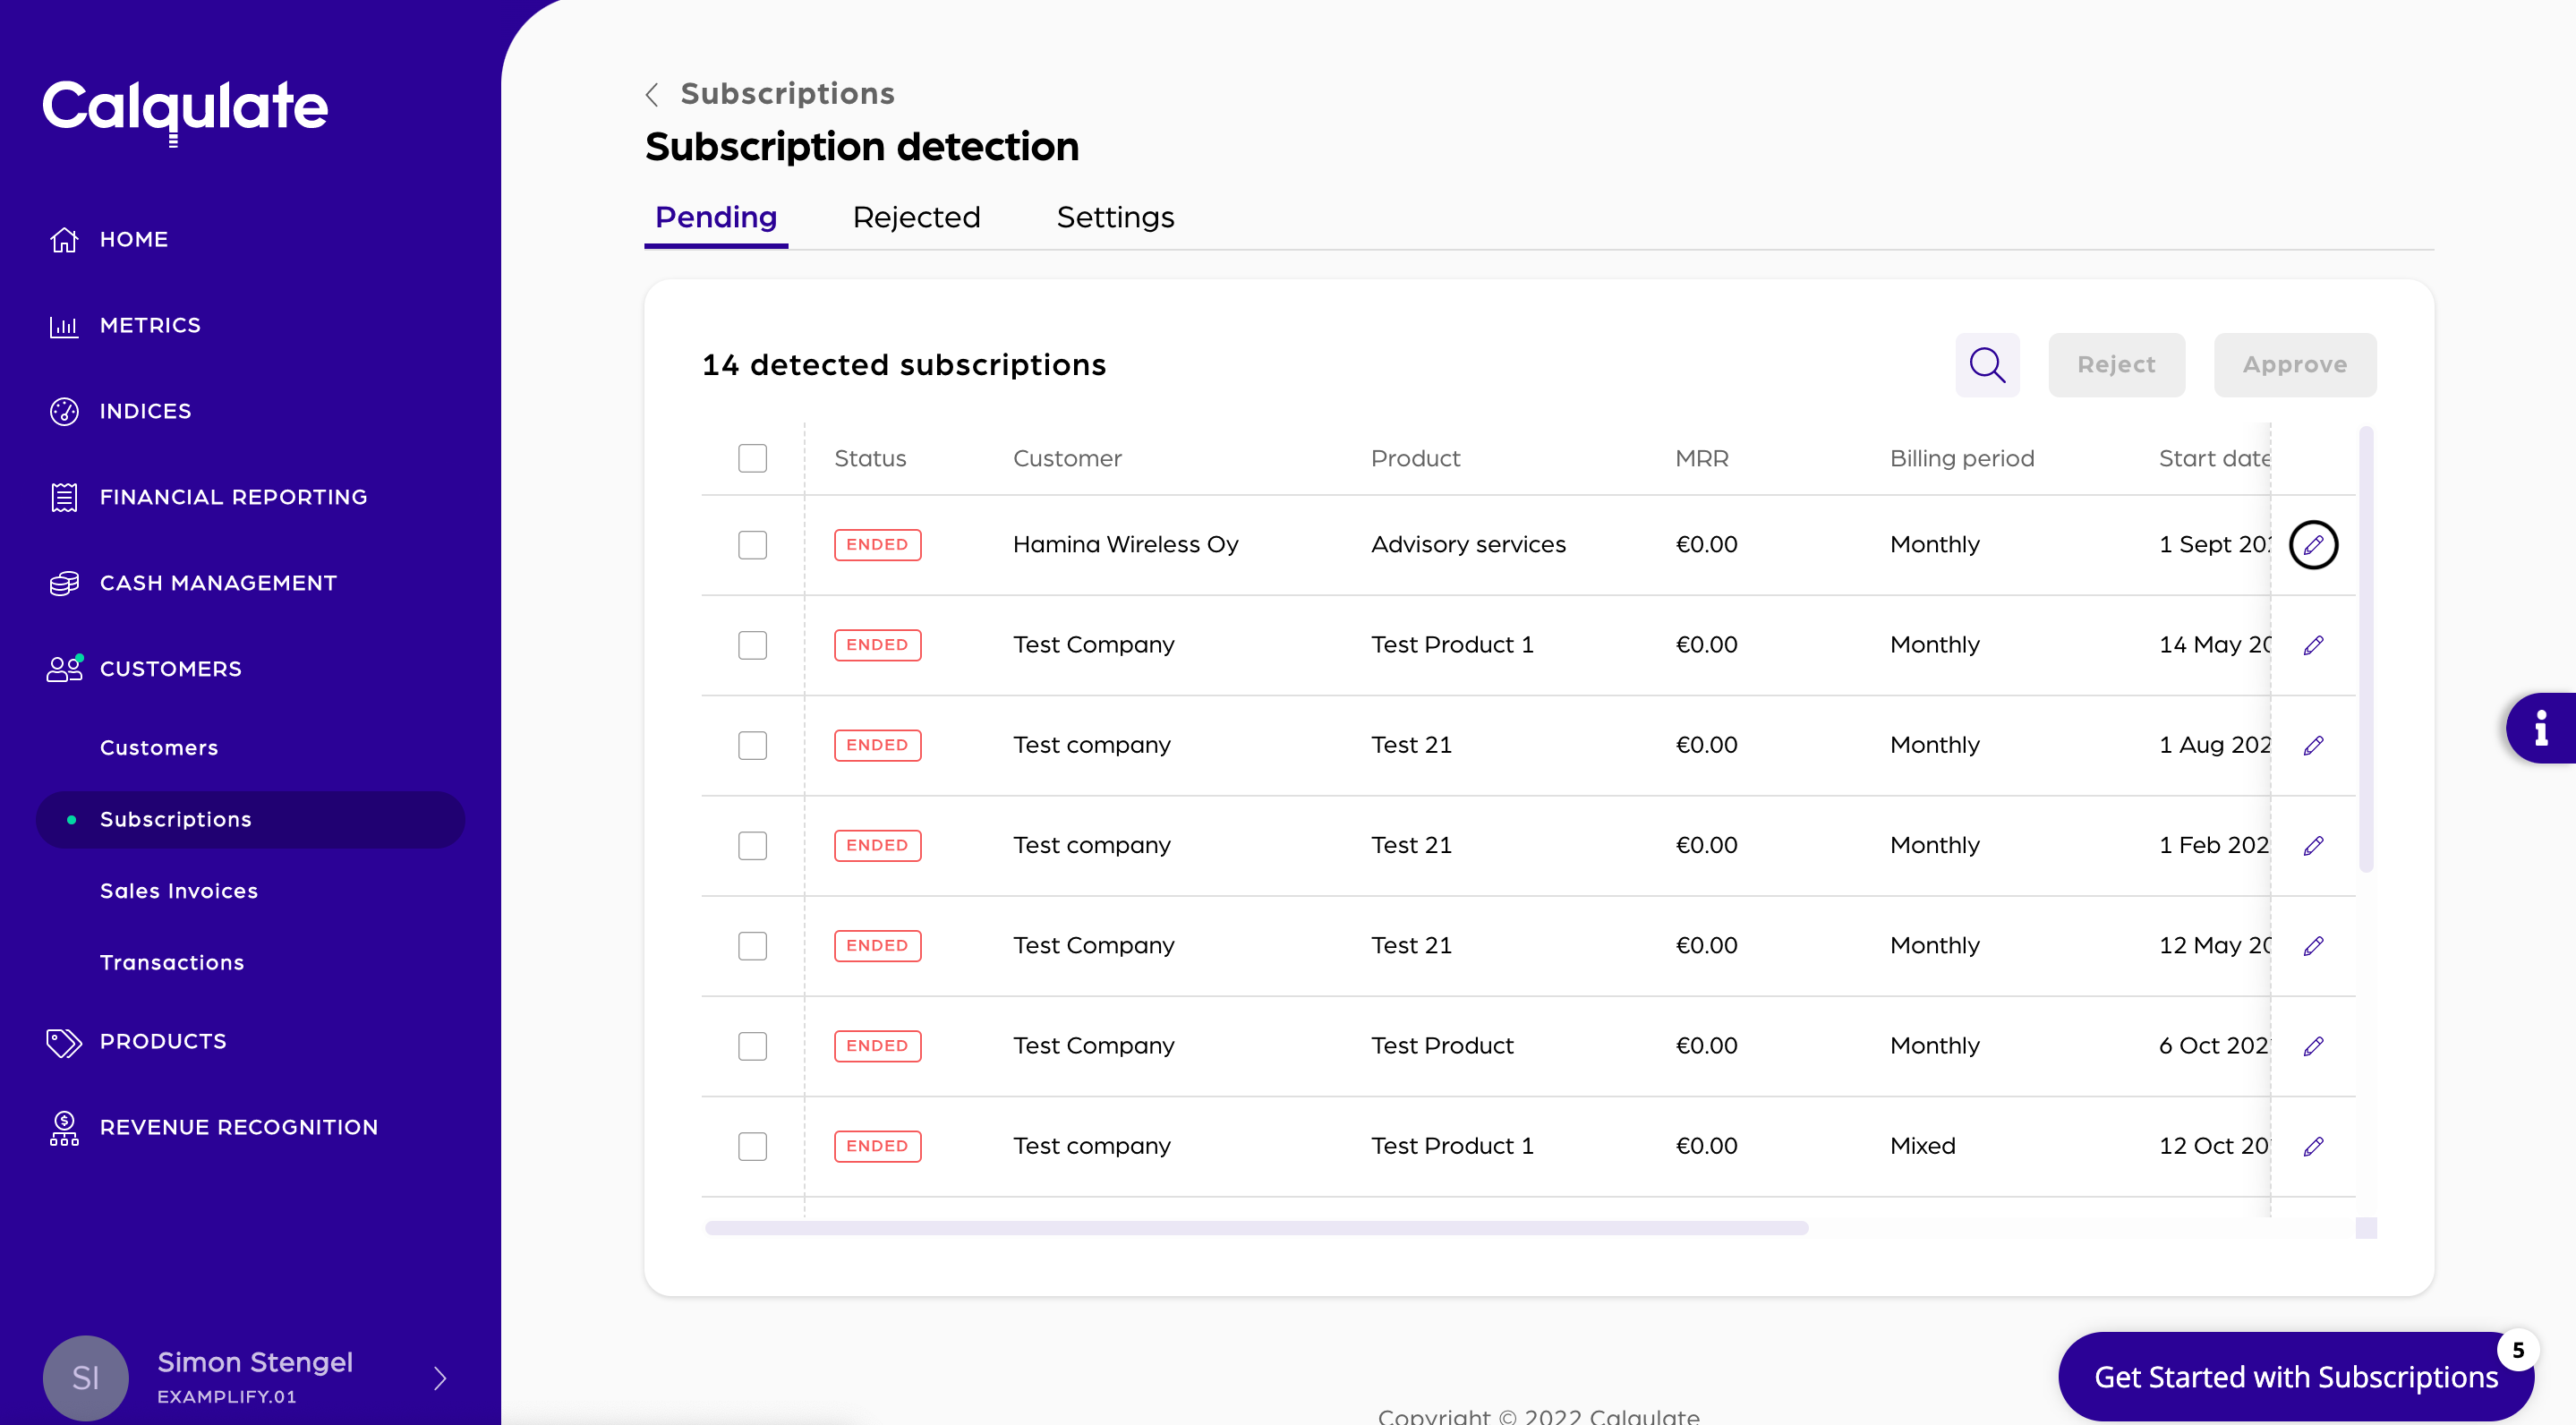
You have now detailed data about the MRR of the subscription, the Invoice amount overview as well as the Invoiced product that is linked to this subscription. On the left side of the screen you can also Review the invoice if there is one linked. To link an invoice, press the button Link invoice, choose the respective invoice and continue with Link.